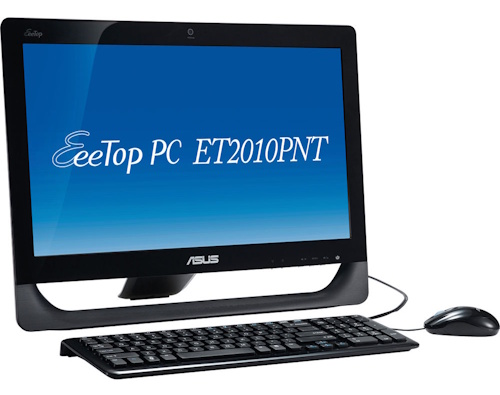
I turned an old ASUS ET2010PNT EeeTop touchscreen PC into a fast, reliable kitchen calendar and email display using Linux Mint XFCE.
The key challenges were legacy BIOS booting, GRUB installation, touchscreen drivers, and Wi-Fi quirks — all of which are solvable with some determination!
Hardware overview
Released back in 2010, my EeeTop ET2010PNT has:
- Intel Atom D510 (dual-core, 64-bit capable)
- 2GB DDR2 RAM
- 750GB 2.5” SATA hard drive
- Slimline DVD/RW drive
- Legacy BIOS (no UEFI support)
- Integrated NVIDIA ION graphics
- Built-in NextWindow 1950 HID touchscreen
- Internal Atheros AR9285 Wi-Fi
—
Step 1: Essential upgrades
Before touching software, I strongly recommend:
- Replacing the HDD with an SSD
- Maxing out the RAM
Both are cheap and will make the system feel dramatically more responsive.
I went for 2x2GB DDR2 SODIMMs (this device uses laptop memory) and a cheap 2.5” Kingston SSD.
After removing the screws, some prying was needed to loosen and remove the back cover.
Once inside, the hardware upgrades were easy to make — just plug and play.
—
Step 2: OS Installation Media
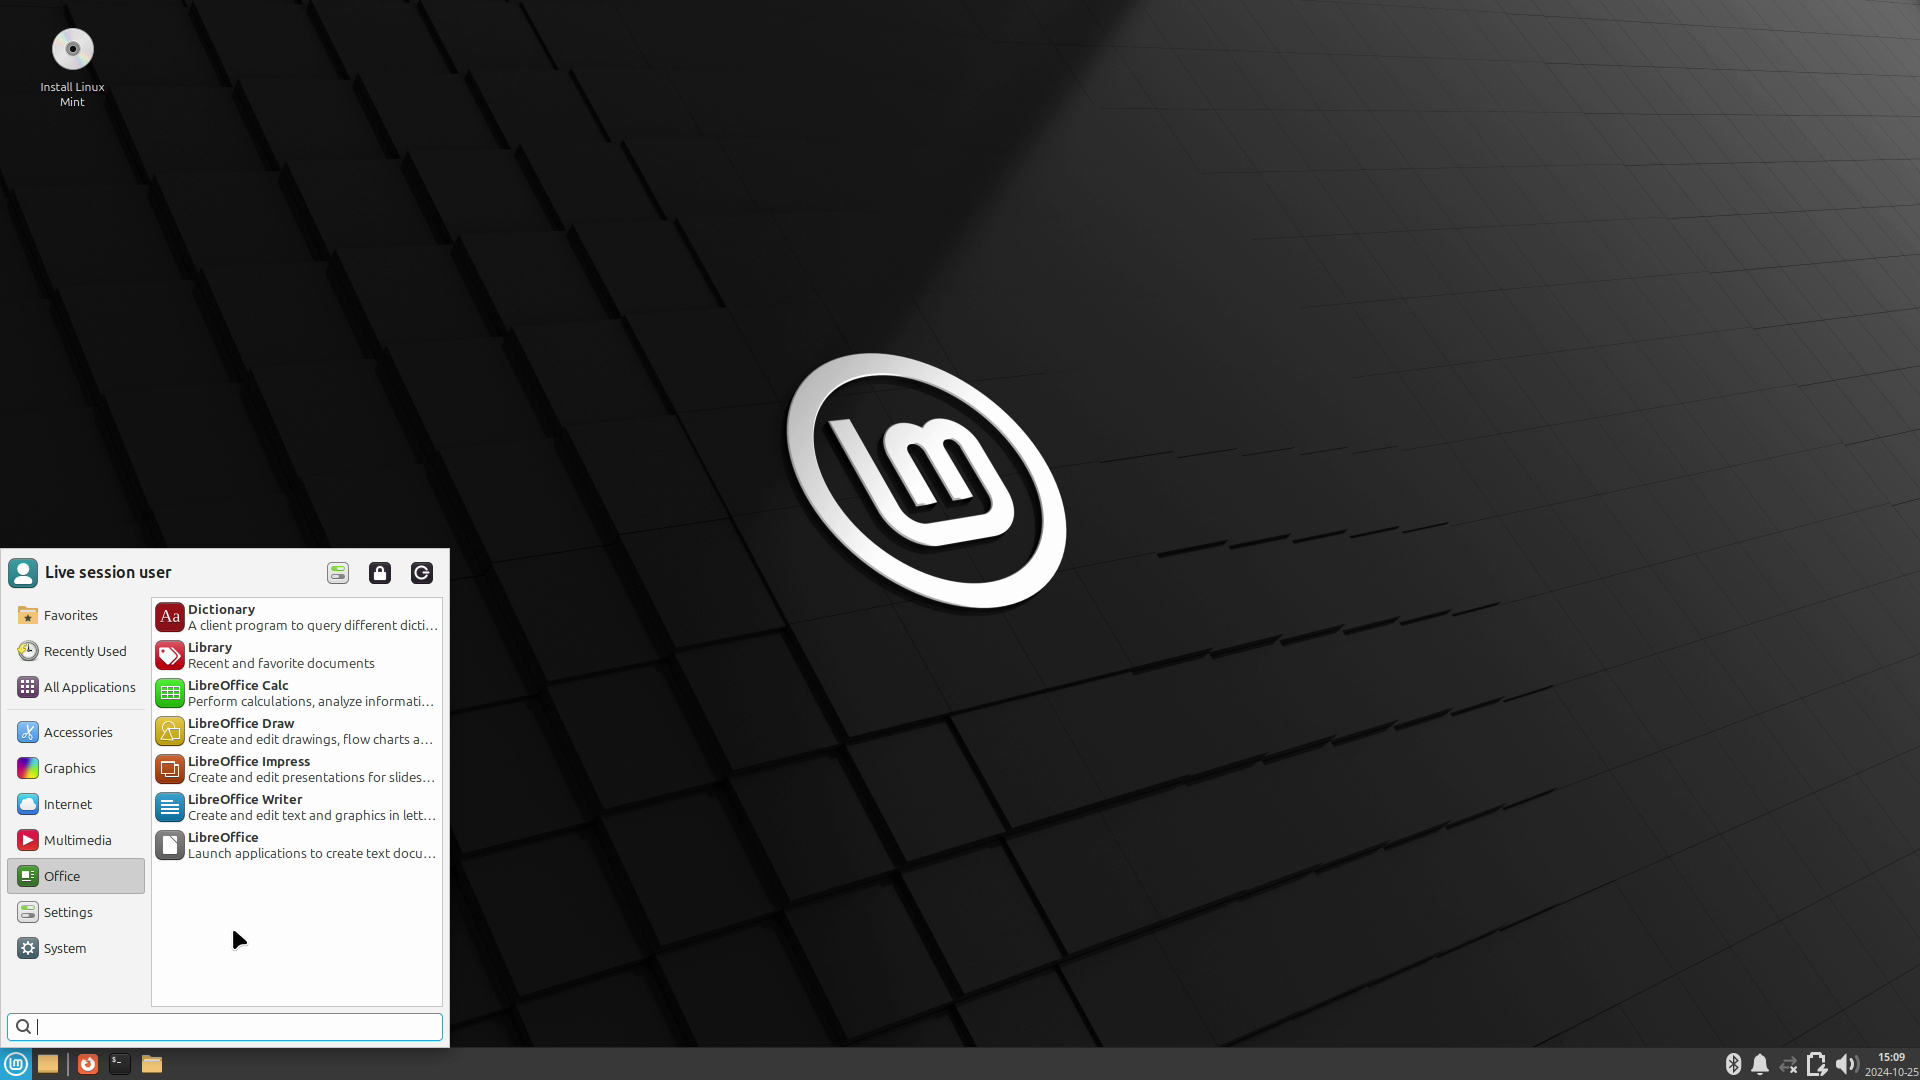
I chose Linux Mint XFCE because it is:
- Lightweight
- Stable
- Well documented
- Familiar to anyone who has used Windows
XFCE also performs well on Atom CPUs and doesn’t insist on GPU acceleration.
After a little research, I (happily) found that the D510 CPU in my Eeetop is fully 64-bit capable. I downloaded the 64-bit version of Mint XFCE and used Balena Etcher to create USB installation media.
Unfortunately this would not work. The machine stubbornly refused to boot the USB stick, I suspect an incompatibility with the legacy Eeetop BIOS.
After too much time wasted, I gave up on USB and went old school — time to burn a bootable DVD!
—
Step 3: BIOS configuration (important)
Enter the BIOS (hit F2 during boot) and ensure that the DVD drive has the highest boot priority.
Without this the Linux Mint installer won’t start.
Save and exit.
—
Step 4: Booting the installer (network quirks)

On the first try, the Linux Mint installer may hang on a black screen with white squares.
If that happens, unplug the Ethernet cable during boot. Surprisingly, this can avoid early boot deadlocks on older Atom systems.
One additional tip: listen for the DVD drive. So long as it’s still spinning, the OS will (eventually!) load.
—
Step 5: Correct disk partitioning (legacy BIOS!)
Unfortunately the Eeetop doesn’t understand the modern UEFI boot partition created by the Linux Mint installer.
The BIOS is just too old — it only understands the old MS-DOS style Master Boot Record (MBR).
So some special disk partitioning is needed.
Open GParted before installing
Menu → Administration → GParted
Create a new partition table
- Device → Create Partition Table
- Choose: msdos
⚠️ Do not use GPT
⚠️ Do not create an EFI partition
Create a single partition
- Primary
- ext4
- Use the full disk
You should end up with:
/dev/sda1 ext4
—
Step 6: Install Linux Mint
From the Mint Xfce desktop, double click “Install Linux Mint” to start the installer process. When asked about installation type:
- Choose “Something else”
Assign:
/dev/sda1→ mount point/→ format enabled
Bootloader location (critical)
Install bootloader to /dev/sda. Not /dev/sda1.
You may see a warning about no EFI partition. This is normal and safe to ignore on legacy BIOS systems like our EeeTop.
—
Step 7: Fixing GRUB
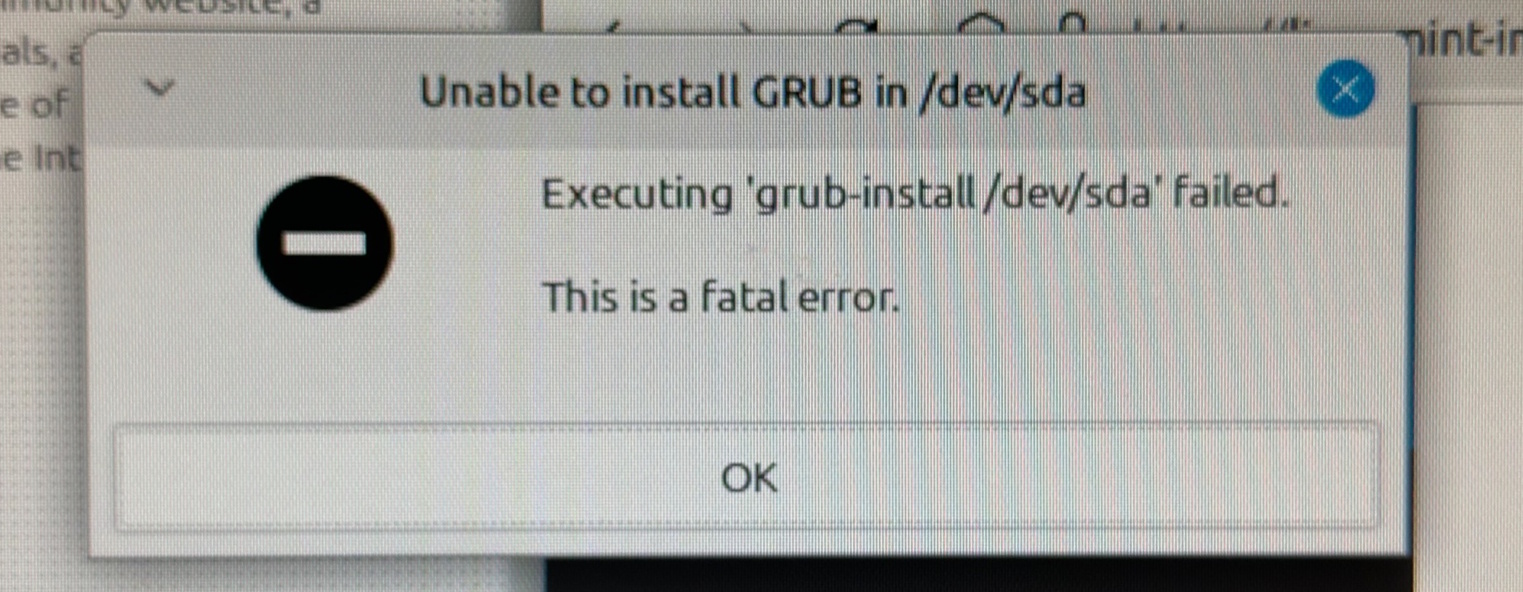 A GRUB installation failure — common on legacy systems.
As the Linux installer finishes up, you’ll likely see a GRUB error like the above.
This is expected. We just need to mount the new Linux partition:
sudo mount /dev/sda1 /mnt
sudo mount —bind /dev /mnt/dev
sudo mount —bind /proc /mnt/proc
sudo mount —bind /sys /mnt/sys
sudo chroot /mnt
And install legacy GRUB explicitly:
grub-install —target=i386-pc /dev/sda
update-grub
Exit, unmount, and reboot.
After this, the system should boot cleanly from disk.
—
Step 8: Wi-Fi quirks
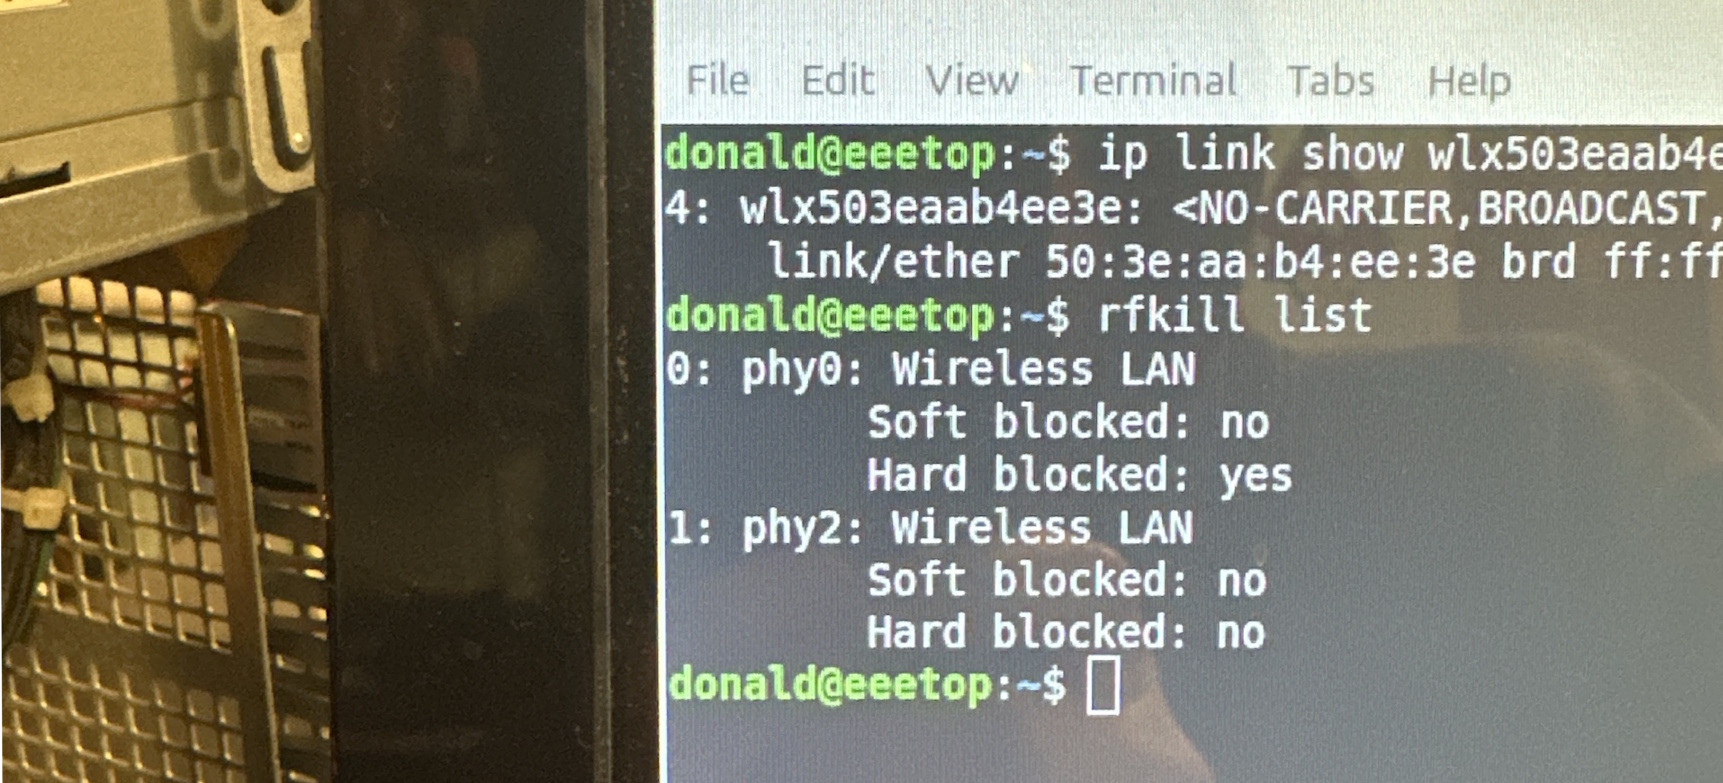
Unfortunately I was unable to get the built-in Atheros Wi-Fi working. It repeatedly asserted that it was “hard blocked” and could not be coaxed to life.
Even worse, this Wi-Fi kill switch disables all Wi-Fi globally — so even USB Wi-Fi wouldn’t work.
To fix this, I needed to blacklist the Atheros driver:
echo “blacklist ath9k” | sudo tee /etc/modprobe.d/blacklist-ath9k.conf
sudo update-initramfs -u
After reboot, any USB Wi-Fi adapter works normally (phew!).
—
Step 9: Touchscreen support (NextWindow)
The built-in touchscreen uses a NextWindow 1950 HID controller, which modern kernels no longer support out of the box.
I used the community-maintained nwfermi driver, which works great.
This install process is somewhat manual and required a compile from source.
Find the instruction on GitHub here.
—
Step 10: Software choices
Browser
- Chromium
- Launched in kiosk mode
- Keyring disabled using:
—password-store=basic
Email & calendar
- Thunderbird
- Built-in calendar view
- Works well with Microsoft 365 via IMAP + CalDAV
- Can start directly in calendar mode:
thunderbird -calendar
Other Options
- Geary (lightweight email client)
- GNOME Calendar
- Orage (another calendar option)
—
Step 10: Kiosk behaviour
To make the system feel like an appliance:
- Enable auto-login
- Disable screen blanking and sleep
- Autostart Chromium or Thunderbird
- Increase font sizes for touch readability
- Disable unnecessary desktop UI elements
—
The end result
The finished system:
- Boots reliably from SSD
- Supports touch input
- Has wired and wireless networking
- Displays a large, readable family calendar
- Allows light email interaction
- Feels purpose-built rather than “an old PC”
Most importantly, it’s pleasant to use, which is the real success metric for a kitchen device like this.
—
Final thoughts
This project was a reminder that:
- Legacy hardware is still very usable
- Modern Linux defaults don’t always suit old machines
- Touchscreens on Linux require patience
- Reusing old hardware can be genuinely rewarding
What started as a slow, obsolete Windows machine is now a useful, always-on household appliance — and that feels like a good outcome!