I spent some time reading about Ghost themes today, with a view to creating my own.
The folks over at Ghost are smart cookies, and they’ve made the theming process remarkably simple. So simple, in fact, that you can create your own theme (from scratch) in 5 minutes. Here’s how to do it.
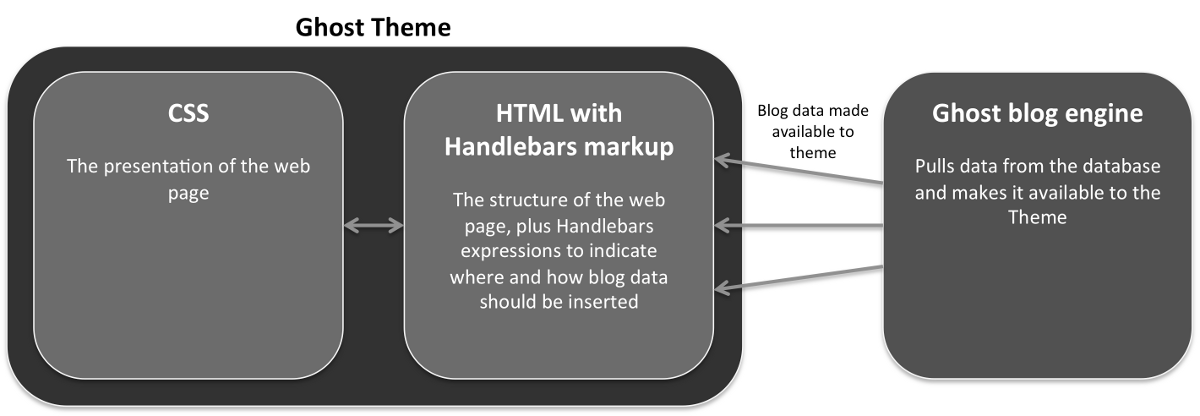
Wait! What are Ghost themes?
Ghost themes take your blog content (the data) and format it for the web (the presentation). By separating these two, you’re always free to change the look and feel of your blog without adjusting the content. At a high level, they work like this:
Handlebars expressions? What are they?
Handlebars is a templating language, designed to allow separation between HTML and a data source:
<div class="entry">
  <h1>{{title}}</h1>
  <div class="body">
    {{body}}
  </div>
</div>
Above shows a simple Handlebars template. {{title}} and {{body}} are Handlebars expressions which will be swapped out at runtime with actual data. The rest of the snippet is standard HTML which (along with CSS) provides the structure, layout and design.
OK. What does a Ghost theme look like? And how does it use these Handlebars templates?
A Ghost theme is:
- A directory on the file system
- This directory contains multiple Handlebars templates, each with the
.hbsfile extension. - The templates work collaboratively to render your blog content.
A Ghost theme must contain the following two files. Everything else if optional.
post.hbs- This is the template for an individual post.
- Ghost always passes it a
postobject which is used to render post data to the page. - An example
post.hbsfile:
{{#post}}
<h1 class="post-title">{{title}}</h1>
<p>{{content}}<p>
{{/post}}index.hbs- This is the template for the blog homepage.
- Ghost always passes it the
postsobject. This is a collection of all the posts that should be displayed. - You can loop through the collection to output all your posts to the page.
- An example
index.hbsfile:
{{#foreach posts}}
  <h1 class="post-title"><a href="{{url}}">{{title}}</a></h1>
  <p>{{content}}<p>
{{/foreach}}
That really is it. To prove it, try this:
Create your own theme in 5 minutes
- Create and configure a Ghost development instance (if you haven’t already).
- Navigate to the
themesdirectory (mine’s at/ghost-0.4.2/content/themes). - Create a new folder for your theme. Call it whatever you like (I chose the rather boring “mytheme”).
- Use the code snippets above to create the two new files:
post.hbsandindex.hbs. - Start/restart your Ghost development instance by issuing
npm startfrom the command line. - Navigate to your Ghost blog’s settings page (mine’s at http://localhost:2368/ghost/settings/general/#)
- Scroll to the bottom of the page. You should see your new theme listed in the Themes drop-down. Select it and hit Save.
- Navigate to your blog (mine’s at http://localhost:2368/) to see your new theme in action!
Pretty easy huh?