![]()
With RetroPie, your Raspberry Pi can become the ultimate retro-gaming machine. Mega Drive, SNES, even PlayStation all run great and with a little extra work you can stream more taxing games from your home PC
Interested and want to get started? Read on
What you need
- Raspberry Pi and a compatible power supply. For best performance use a Raspberry Pi 3 Model B+
- Raspberry Pi case. Optional but recommended. I use this one
- MicroSD card. At least 8GB recommended. Find compatible cards listed here
- MicroSD card reader. To write the downloaded RetroPie image to your SD card
- Television/monitor and HDMI cable
- Wi-Fi dongle or (for best streaming performance) Ethernet cable
- Wired Xbox 360 controller, or a Wireless Xbox 360 controller paired with a Wireless Gaming Receiver. Many other controllers are supported, but the Xbox 360 controllers work best
- USB keyboard. To edit config files on your Raspberry Pi. Alternatively you can do this from your networked PC via SSH. More details below
Install RetroPie
Step 1. Download RetroPie image and write to SD card
Some fairly simple first steps. Follow the official instructions here
Step 2. Enable SSH on your Pi
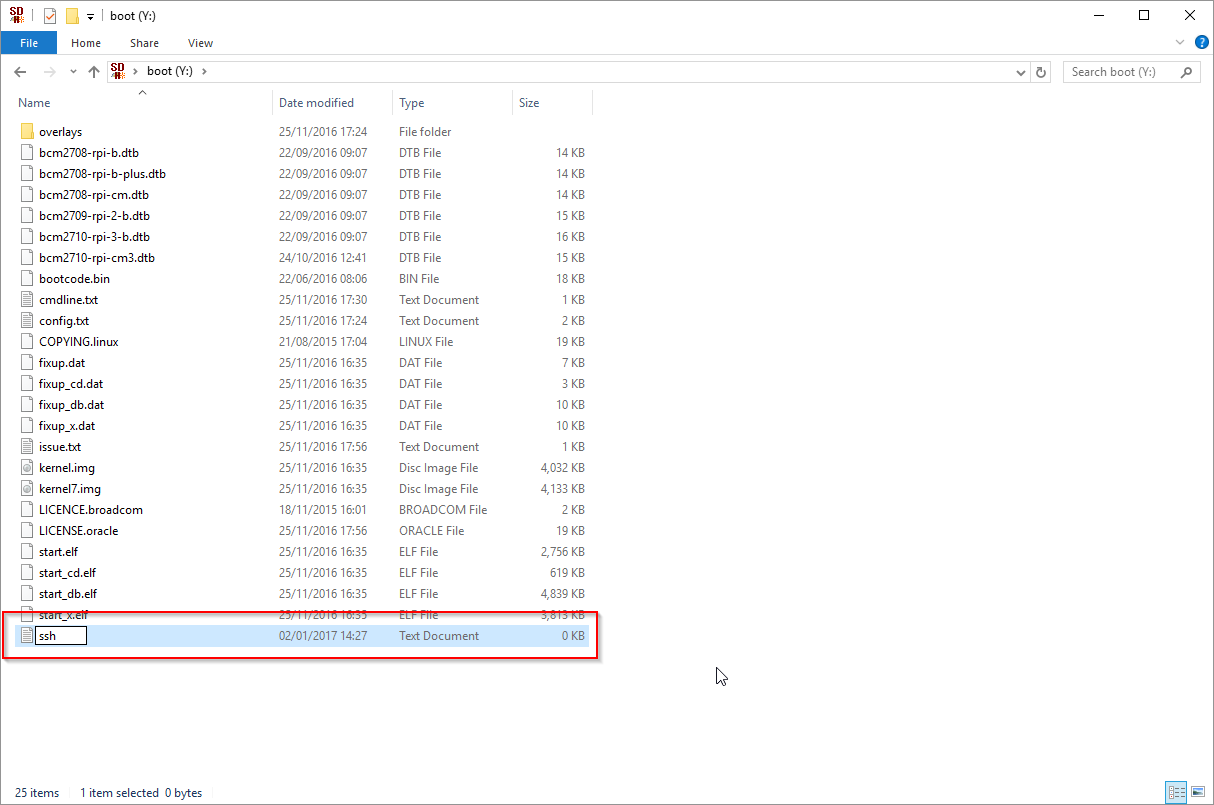
Create a file named ssh in the root directory of your SD Card. This way you can configure RetroPie from your networked PC, no keyboard required. Learn more here
With this feature enabled, you can use any SSH client (I like PuTTY) to remotely connect to your Pi. The default connection details are:
- Hostname:
retropie - Username:
pi - Password:
raspberry
Alternatively, you can use a USB keyboard to configure Retropie directly
Step 3. Pair your Wireless Xbox 360 controller
If you have a Wireless Xbox 360 controller, you’ll need to pair it with your Wireless Gaming Receiver before continuing. Find the instructions here
Step 4. Boot up your Pi and configure your controller
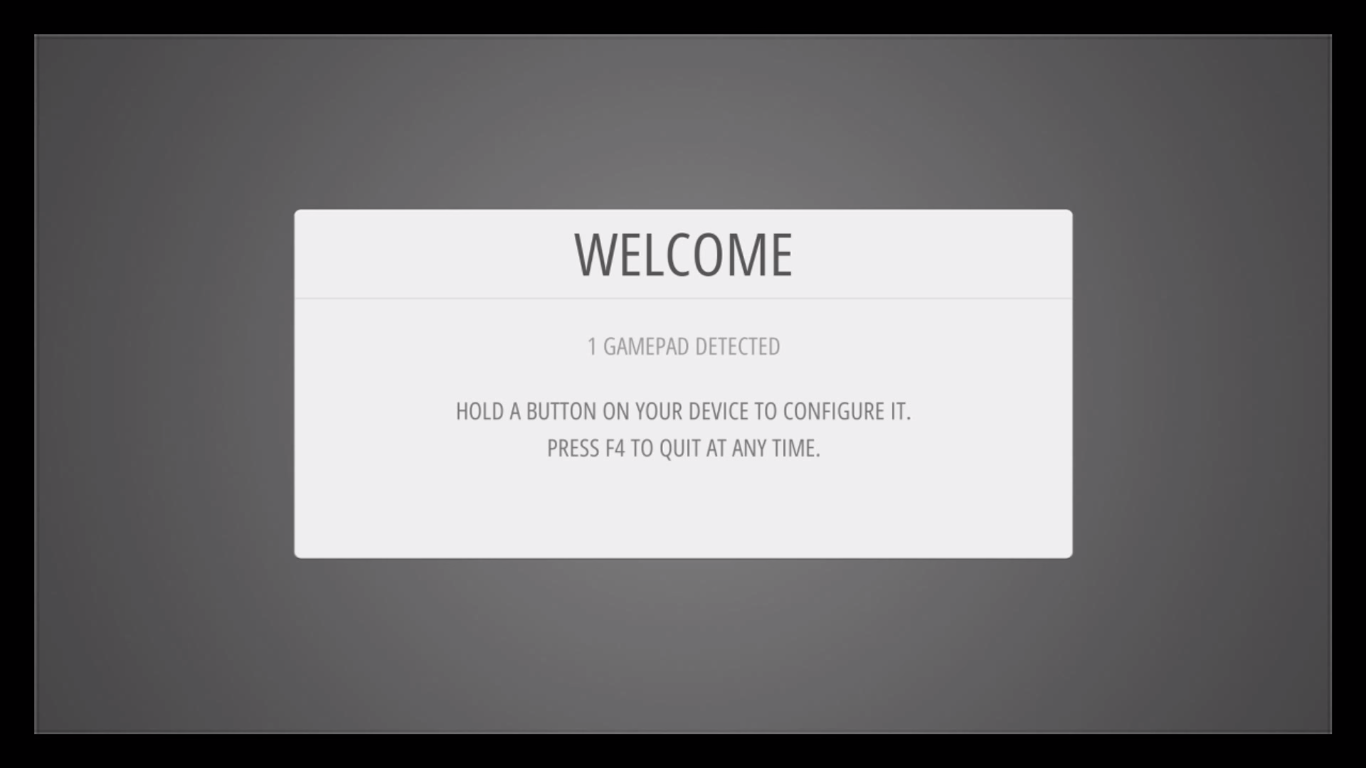
Switch on the power to your Raspberry Pi. After a minute or so, EmulationStation will launch and ask you to configure your controller:
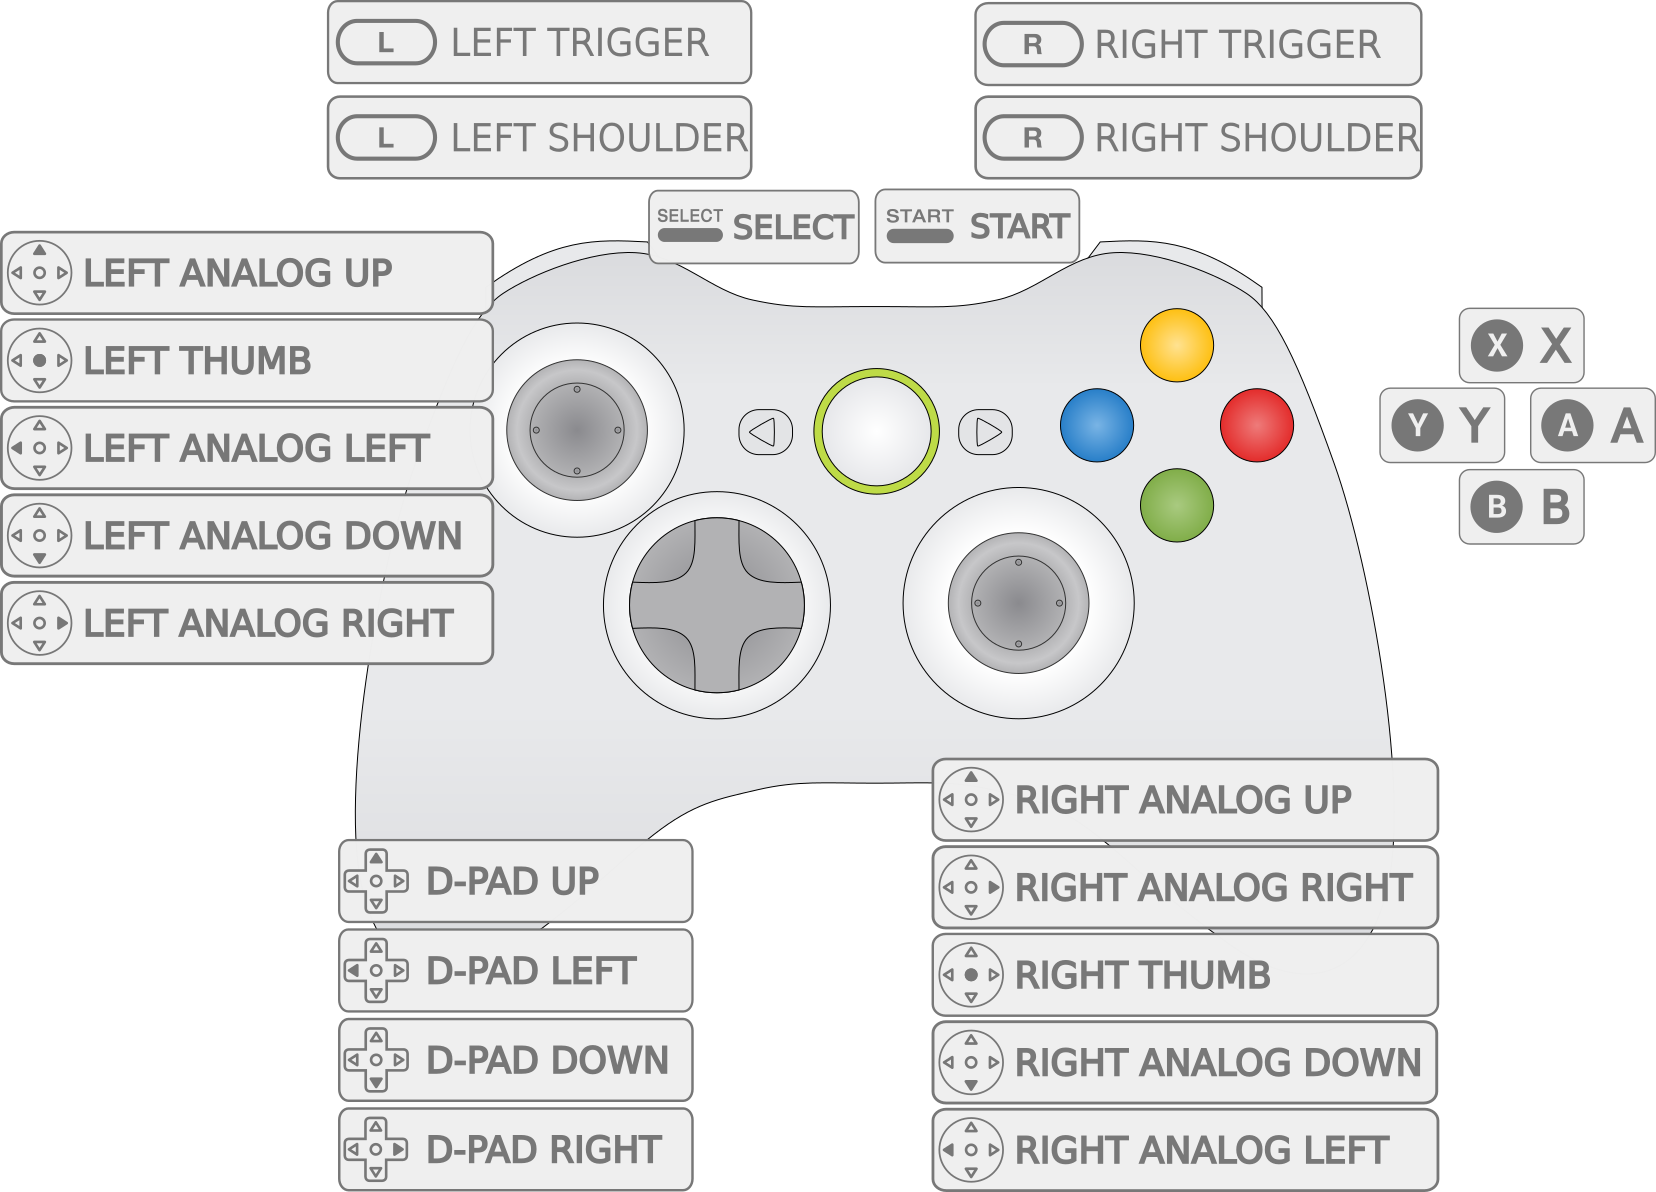
Go ahead and configure your controller as per the diagram below
An important note! EmulationStation follows the SNES button layout. So when configuring your Xbox 360 controller, you’ll need to switch X with Y, and A with B. Yes, this is confusing - but don’t worry there is a fix for this later
Step 5. Make a note of the RetroPie hotkeys
During controller configuration, you’ll be asked to specify a “Hotkey”. I recommend “Select” or the Xbox Guide button. Pressing this Hotkey in combination with other buttons enables fast access to emulator features directly from your joypad. Make a note of these below:
| Button Combo | Action |
|---|---|
| Hotkey+Start | Exit |
| Hotkey+Right Shoulder | Save |
| Hotkey+Left Shoulder | Load |
| Hotkey+Right | Input State Slot Increase |
| Hotkey+Left | Input State Slot Decrease |
| Hotkey+X | RGUI Menu |
| Hotkey+B | Reset |
Optimize controller settings
Now you’re done with the initial RetroPie install, it’s time to optimize the controller settings
Step 1. Switch A and B buttons in EmulationStation
As mentioned above, the Xbox 360 controller differs from the SNES controller layout preferred by EmulationStation: notably the A and B buttons are reversed. The good news: EmulationStation has a setting to fix this:
- In EmulationStation, head to
RetroPie > Configuration > RetroPie Setup. This will launch a separate settings program - Navigate to
Manage packages > Manage core packages > emulationstation > Configurations/Options, then enableSwap A/B Buttons in ES - Save changes and exit the settings program
Step 2. Enable analog sticks
Wouldn’t it be great to use the 360 controller’s analog sticks instead of that mushy d-pad? Here’s how:
- From the EmulationStation menu, navigate to
RetroPie > Configuration > Configuration Editor. This will launch a separate settings program - Navigate to
Advanced Configuration > Configure Libretro options - Select
all/retroarch.cfg - Change the setting for
input_player1_analog_dpad_modeto1. This will enable the left analog stick on your Xbox 360 controller - Navigate back to the main screen with
Cancel. Save changes and exit the settings program
Step 3. (Re)configure input to enable your changes
You’ll need to reconfigure input before EmulationStation and your emulators will pick up the changes above. In EmulationStation, press Start and choose Configure Input. This will take you through the same controller configuration wizard from earlier. As before, don’t forget to switch X with Y, and A with B.
Copy ROMs
Step 1. Copy some ROMs via SFTP
You’ve probably noticed the EmulationStation home screen is a little blank. Where are the NES, SNES and Mega Drive emulators? EmulationStation is smart: it won’t show you any emulators or platforms unless you have ROMs to play on them. You need to transfer them first
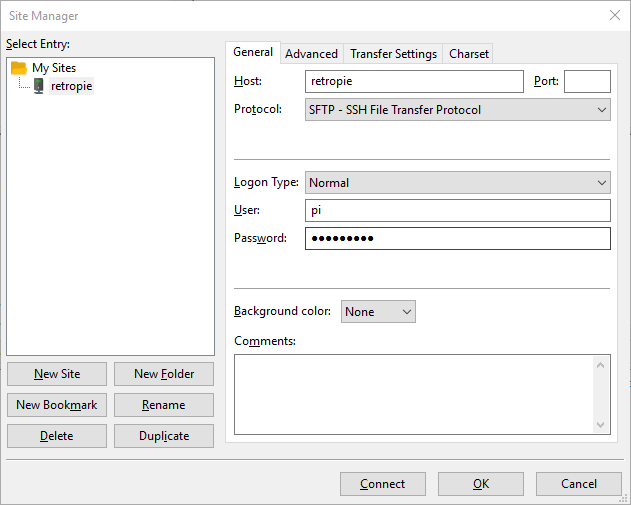
I recommend SFTP to transfer files. On Windows, I use FileZilla, but any SFTP client is good. Go to File > Site Manager > New Site and add the below:
- Host:
retropie - Protocol:
SFTP - SSH File Transfer Protocol - Logon Type:
Normal - User:
pi - Password:
raspberry
The Site Manager should look like this:
Hit Connect and navigate to the following directory: /home/pi/RetroPie/roms
You’ll see lots of folders for each platform. Copy the ROMs into the corresponding folder for their platform. I recommend you copy zips (the file size adds up!) and to use the No Intro ROM naming convention (if you use a naming convention, EmulationStation and any metadata scrapers can easily find and surface game metadata like descriptions, release dates, screenshots etc for your games)

Step 2. Restart EmulationStation to make ROMs appear
How do you make the ROMs and emulators show up? Hit the Start Button on your controller and navigate to Quit > Restart EmulationStation. After a brief moment you should see the following:

Time to get playing!
Add metadata
So everything works, but EmulationStation looks a bit plain. You want metadata and screenshots, right? Here’s how
Step 1. Exit EmulationStation
We need to close EmulationStation down before we update the metadata as EmulationStation holds onto the metadata files. The scraper we’re going to use won’t even open if EmulationStation is running. So hit the Start button and navigate to Quit > Quit EmulationStation
Step 2. Install and Run Steven Selph’s scraper
Either via SSH or with a USB keyboard attached to your pi, enter the following
sudo ~/RetroPie-Setup/retropie_setup.shThis will launch the RetroPie Setup script. Once it launches, navigate to Manage Packages > Manage Optional Packages and select scraper (right at the bottom for me)
Select Install from source to install the scraper. This will install Steven Selph’s metadata scraper - one of the better ones out there. The install may take some time as it has to install various software libraries.
Once the install completes, select Scrape all systems. Again, this will take some time as the scraper downloads game metadata and images from the web
Once the scrape completes, select Cancel, Back multiple times and eventually Perform Reboot. When EmulationStation reloads, you should now see pretty metadata for your ROMs!

Step 3. Fix broken metadata
The scraper won’t pick up everything. Especially for obscure Japanese titles and ROM hacks, you’ll need to add your own metadata and artwork
You can do this by editing the gamelist.xml file located in ~/.emulationstation/gamelists/[SYSTEM_NAME]/gamelist.xml. In the XML file, each game has an entry like so:
<game>
  <path>./10-Yard Fight (USA, Europe).nes</path>
    <name>10-Yard Fight</name>
    <desc>You're the quarterback in this amazingly real football game! Enjoy realistic gridiron action as you move your team up and down the field to victory! Run, pass, kick, punt... you call the plays in this true-to-life football game. Play against the computer or against a friend for hours of real football action. The sights, the sounds and the plays are so real you'll think you're right on the fifty yard line!</desc>
    <image>~/.emulationstation/downloaded_images/nes/10-Yard Fight (USA, Europe)-image.jpg</image>
    <releasedate>19851001T000000</releasedate>
    <publisher>Nintendo</publisher>
    <genre>Sports</genre>
    <developer>Irem</developer>
    <players>2</players>
</game>
Just edit the XML file as needed. Use SFTP to upload images to your Pi which you can then reference in the XML. The default (and best) location is ~/.emulationstation/downloaded_images/[SYSTEM_NAME]/
Adjust screen border
Perhaps you’re using a monitor or TV in “Just Scan” or “Pixel Perfect” mode and see black borders around the EmulationStation menu and all your games? You can fix this with some Pi settings
Step 1. Update boot config to disable overscan
Exit EmulationStation and enter the following from the command line:
sudo nano /boot/config.txtThis will load the nano text editor. Uncomment the line #disable_overscan=1 so that it becomes disable_overscan=1
Press Ctrl+X to Exit and Y to save (this is a common pattern for RetroPie)
Step 2. Reboot Pi to see the new settings
Reboot the pi with the following command:
sudo rebootOnce the Pi restarts, the border should be gone! There are a bunch of controls to optimize overscan and borders in a more granular way. For more info see the official Raspberry Pi Video Options documentation
That’s it! If you want to play some more demanding games you can setup Game Streaming. Otherwise enjoy your RetroPie!
Comments