As discussed before, Atari ST disk images are freely available on the web, Emuparadise probably being the best resource.
But how can you play these games on physical Atari ST hardware?
One way is to use your Windows PC to prepare a bootable game disk. Once it’s done, pop the disk into your ST floppy drive, power-on and you’re good to go!
Here’s how.
What you need
Internal 3.5” floppy drive

You’ll need a 3.5”, 1.44MB PC floppy drive that uses the old 34-pin connector. Unfortunately, for our purposes, a USB floppy drive won’t do as:
- Some of them don’t support the standard 720KB Atari ST disk format
- None of them support the “special” 800KB+ disk formats that many ST games use
A few notes to help with your search:
- 34-pin floppy drives are difficult to find new nowadays, so you might go to eBay and pick up a used one
- A lot of modern motherboards are missing the old 34-pin connector. You can add this support via something like the Catweasel, but it’s an expensive option
- All things considered, it might be easier and cheaper to purchase an old PC from eBay with a built in floppy drive. This is what I chose to do:

Makedisk
For writing the images to disk, we’ll use a tool called Makedisk. Written by Darren Birks back in 1997, it’s still the most reliable tool I’ve found. A few facts:
- Makedisk can write both .ST and .MSA images to disk. Sorry, no .STX
- For best compatibility, use DOS. Win98/ME may work, but all newer Windows releases are a no-go due to incompatible floppy drivers
- You can download Makedisk here
- More information at the Makedisk wiki
Some 3.5” floppy disks
Clearly, you need some 3.5” floppy disks to write the images onto.
The ST takes 3.5” Double-Sided, Double-Density floppies, with a regular capacity of 720KB. These are little hard to come by nowadays, but you can occasionally find them on eBay. If 720KB disks prove too hard to find, you can buy 1.44MB Double-Sided High-Density disks and cover the corner over with tape - at a slight reliability cost.
If you’re interested in the official floppy specs, you can find them over on Wikipedia.
A bootable DOS USB drive
As I mentioned earlier, Makedisk works best in DOS. By far-and-away the easiest way to get a DOS environment is via bootable USB media. How-To Geek has an excellent guide you can follow.
How to create the bootable game disk
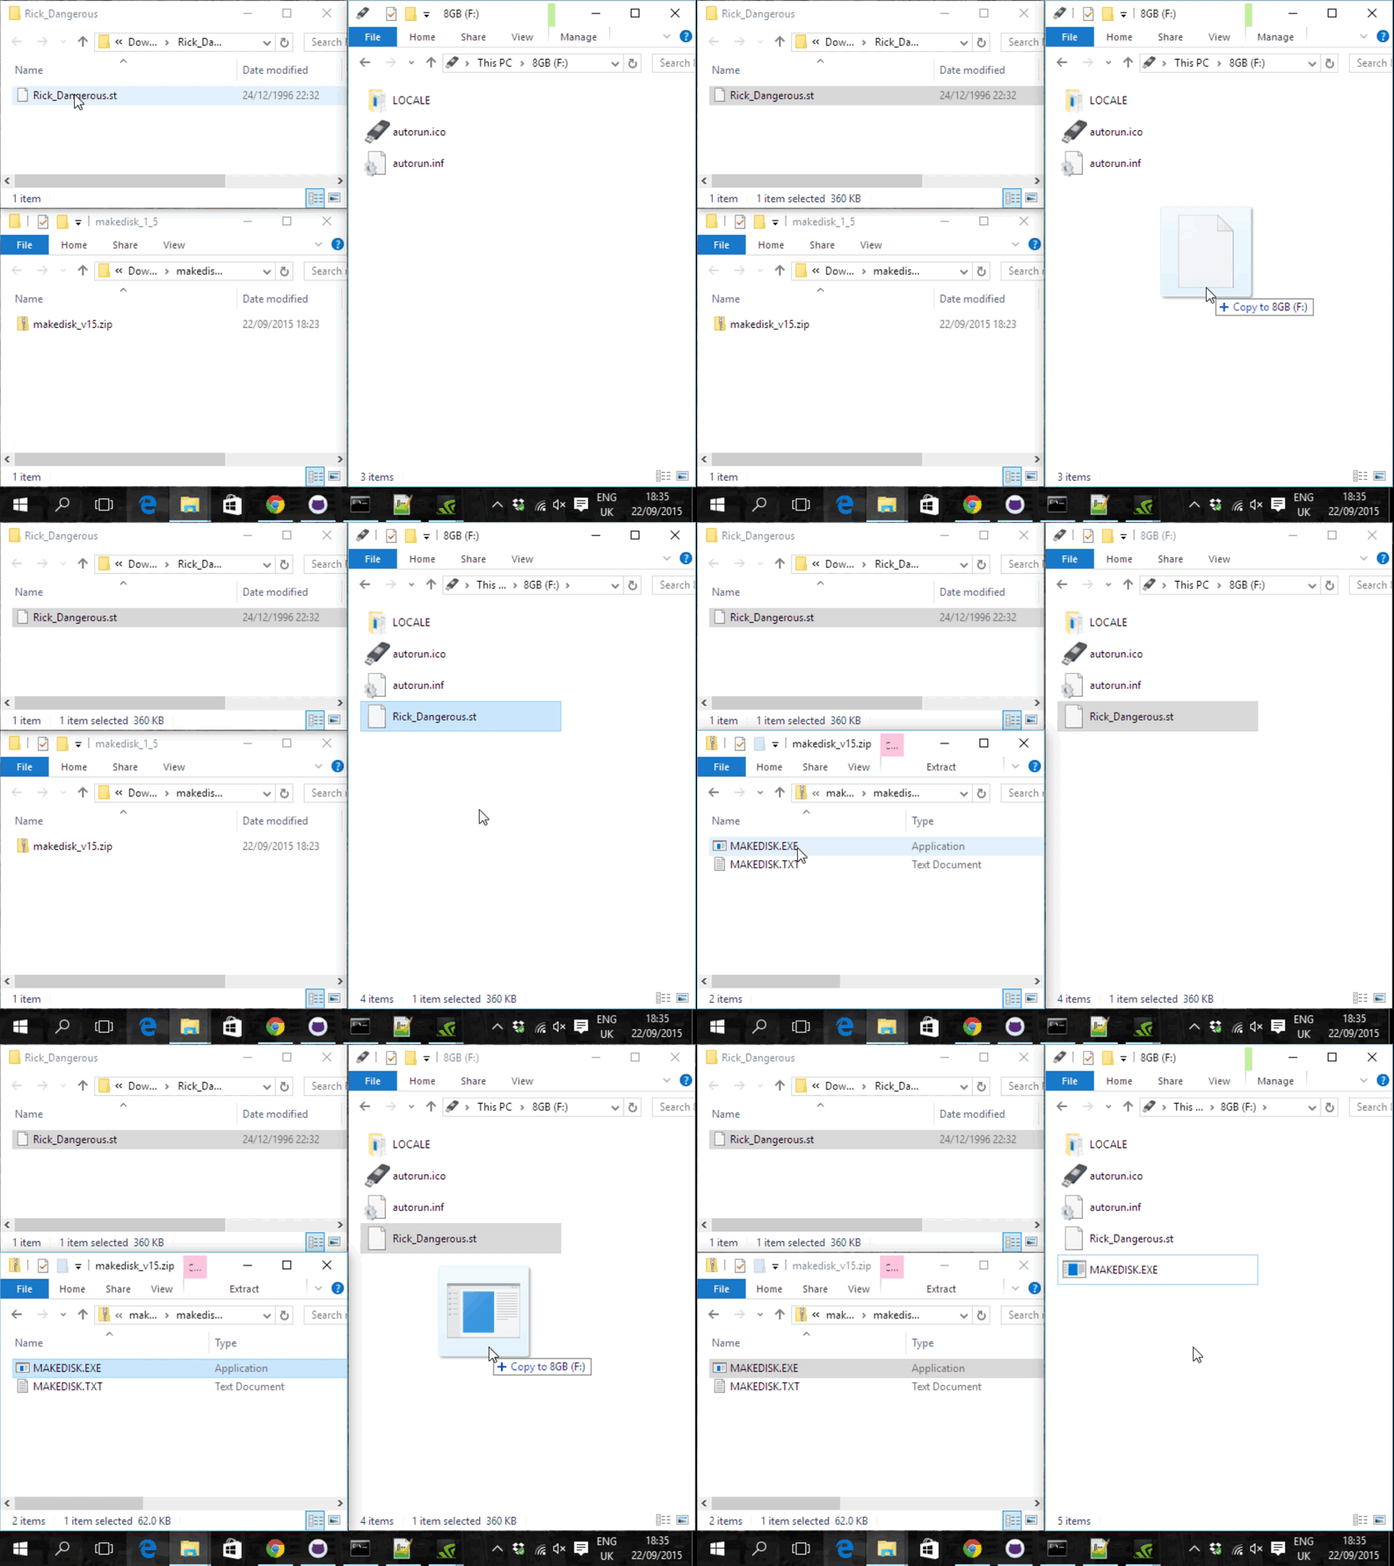
1. Copy data onto USB media
Take your bootable DOS USB drive and copy the following onto it:
- The Makedisk program executable
- The disk image (.MSA or .ST file) you wish to play on your Atari ST

2. Boot from your USB media
Restart your machine and boot from your DOS USB drive. You might have to hit F12 to access the boot menu and then select “USB Drive”.
3. Use Makedisk to prepare game disk
Once you’re at the DOS prompt, invoke Makedisk with the following params to write your disk image:
C:\>makedisk /write <disk image name> /auto
After a couple of prompts (for which the answers are suggested and you should always answer Yes), Makedisk will whirr away and prepare your disk image:

4. Play the game
That’s it! You should now have a working game disk. Put it in your ST and play!

On YouTube
I’ve put together a video copy of this guide too. Find it embedded below.
More Atari ST Posts
- Lotus Esprit Turbo Challenge Enhanced for Atari STE - 17 Apr 2021
- Games With MIDI. The Atari ST Never Sounded So Good! - 19 Jun 2019
- Using an SD card and Ultrasatan to Transfer Files from PC to ST - 08 Mar 2016
- Using Ethernet to Transfer Files from PC to ST - 07 Mar 2016
- Using PARCP-USB to Transfer Files from PC to ST - 24 Feb 2016
- Using Serial Cable and ZMODEM to Transfer Files from PC to ST - 13 Feb 2016
- Using Serial Cable and Ghostlink to Transfer Files from PC to ST - 06 Feb 2016
- How to Split and Copy Large Files to Your Atari ST in Chunks - 31 Jan 2016
- Using Floppy Disk to Transfer Files from PC to ST - 30 Jan 2016
- Transferring Files from PC to ST - 26 Dec 2015
- Use Your PC to Create a Bootable Atari ST Game Disk - 22 Sep 2015
- Playing Downloaded Games on a Real Atari ST - 18 Sep 2015
- Atari in the Attic - 15 Aug 2015
Comments