1. Choosing the right floppy disks
For the vast majority of cases, you’ll want 3.5” Double-Sided, Double-Density (“DD”) floppy disks - they’re the only variety supported by both PC and ST drives. They’re also known as “720KB” floppy disks due to their standard formatted capacity. Unfortunately, manufacturing stopped years ago, so your best option is eBay or specialist ST providers.
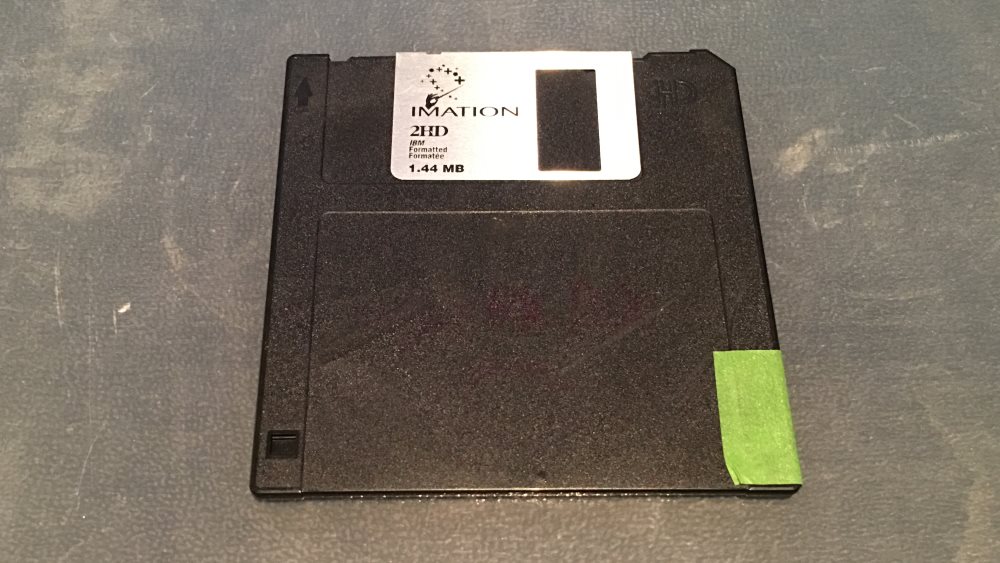
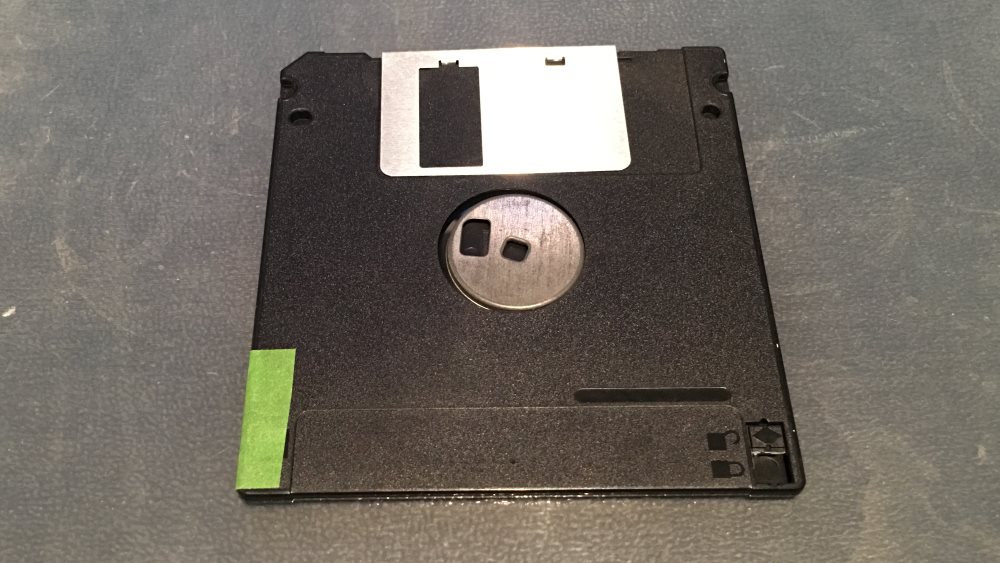
If you can’t find any DD disks, it is possible to repurpose modern 1.44MB High Density (“HD”) disks - albeit at a cost to reliability. HD disks have an extra hole on the right side (across from the write-protect slider), and if you cover this over with some opaque sticky tape (front and back), it’ll fool the detector into thinking the HD disk is an ST-compatible DD floppy:
In very rare cases, your ST drive unit may have been upgraded to support 3.5” HD disks natively. If this is the case, congratulations! You can forget about DD disks and purchase higher capacity HD disks instead.
2. Choosing the right PC floppy drive
Most modern PC’s don’t ship with a floppy drive, so you’ll need to buy one. Your best bet is an internal “ATA” model as they have the greatest compatibility with the various Atari ST disk formats:

If you use a laptop or your PC motherboard doesn’t have a floppy connector, you’re stuck with a (less compatible) USB drive. Many don’t support DD floppies, so be sure to pick one that specifically mentions “720KB” compatibility (like this one).
3. Format floppy disk
You have disks and a drive - now it’s time to prepare the floppy. You need use a disk format compatible with both PC and ST - and luckily the standard MS-DOS/Windows floppy formats are suitable. So the recommended (and easiest) approach is to prepare the floppy disk on your PC. In any modern version of Windows:
format a: /T:80 /N:9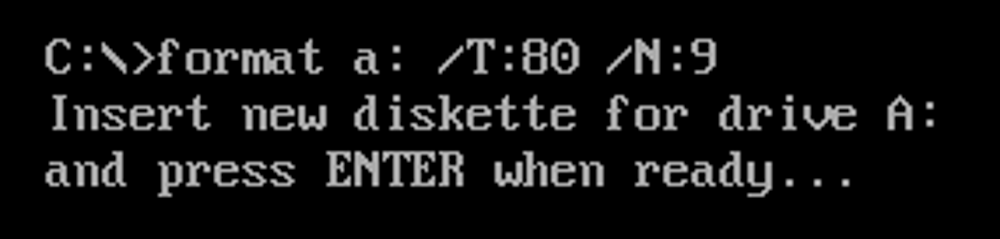
This will create a formatted 720KB floppy, ready for transferring files.
If you’re lucky enough to have a ST with the aforementioned HD drive upgrade, you can use the built-in Windows format utility to quickly create formatted 1.44MB floppies, useful for transferring larger files.
Lastly, if you want to prepare the disk on your ST (I’m not sure why you’d want to do this), you can. But there are some restrictions:
- TOS <= 1.02 will not create a PC-readable floppy disk
- TOS >= 1.04 should work OK
- If you’re not sure, you can use a special formatting program like Kobold or FastCopy
A note on (very) old ST units
Some very early STs (specifically older 520STF models) only feature a 3.5” Single Sided, Double Density (“SS/DD”) drive, supporting disks with a standard formatted capacity of 360KB. If you have one of these, it’s not good news! Modern PC’s can no longer read or write these - so you should consider swapping your ST drive out for a newer model. Find more info here.
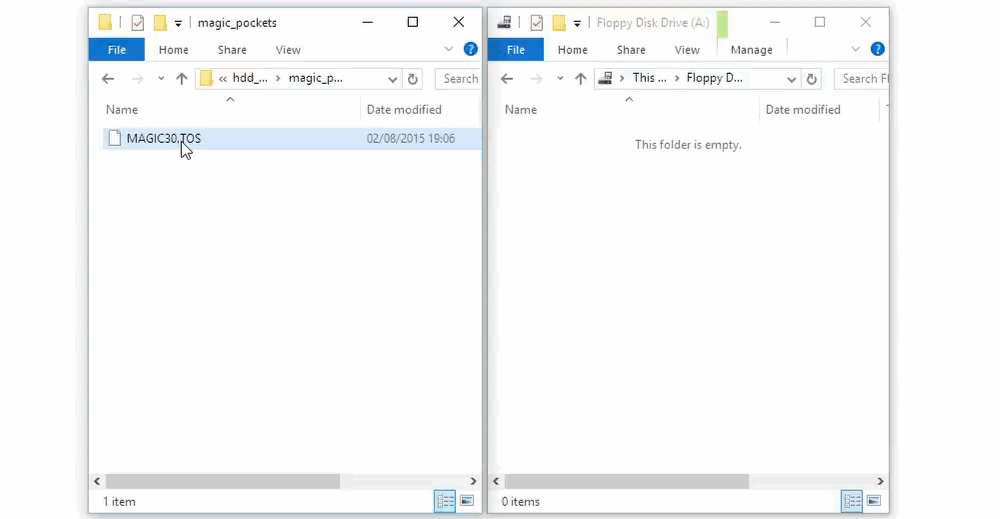
4. Copy files onto floppy disk
Pop your formatted disk into the PC drive and use Windows Explorer (or Command prompt) to copy files. Easy peasy!
5. Load files on ST
Pop the disk into your ST, power on and browse to the files. You’re all done!
Splitting large files
If you have a hard drive attached to your ST, you might want to transfer files bigger than what can fit on a single floppy. You can achieve this using ARJ compression software. Find more details here.
More Atari ST Posts
- Lotus Esprit Turbo Challenge Enhanced for Atari STE - 17 Apr 2021
- Games With MIDI. The Atari ST Never Sounded So Good! - 19 Jun 2019
- Using an SD card and Ultrasatan to Transfer Files from PC to ST - 08 Mar 2016
- Using Ethernet to Transfer Files from PC to ST - 07 Mar 2016
- Using PARCP-USB to Transfer Files from PC to ST - 24 Feb 2016
- Using Serial Cable and ZMODEM to Transfer Files from PC to ST - 13 Feb 2016
- Using Serial Cable and Ghostlink to Transfer Files from PC to ST - 06 Feb 2016
- How to Split and Copy Large Files to Your Atari ST in Chunks - 31 Jan 2016
- Using Floppy Disk to Transfer Files from PC to ST - 30 Jan 2016
- Transferring Files from PC to ST - 26 Dec 2015
- Use Your PC to Create a Bootable Atari ST Game Disk - 22 Sep 2015
- Playing Downloaded Games on a Real Atari ST - 18 Sep 2015
- Atari in the Attic - 15 Aug 2015
Comments