At some point, you’ll most likely want to transfer files from PC to ST. One common approach is to use the Ghostlink software along with the correct cabling.
What is Ghostlink?
Ghostlink mounts a folder from your PC file system as an extra drive/partition on your ST’s GEM desktop, allowing you to copy files back and forth. Connection is made via a serial or null modem cable.
Here’s how to get started!
1. Choose the right cable, connect your PC and ST together
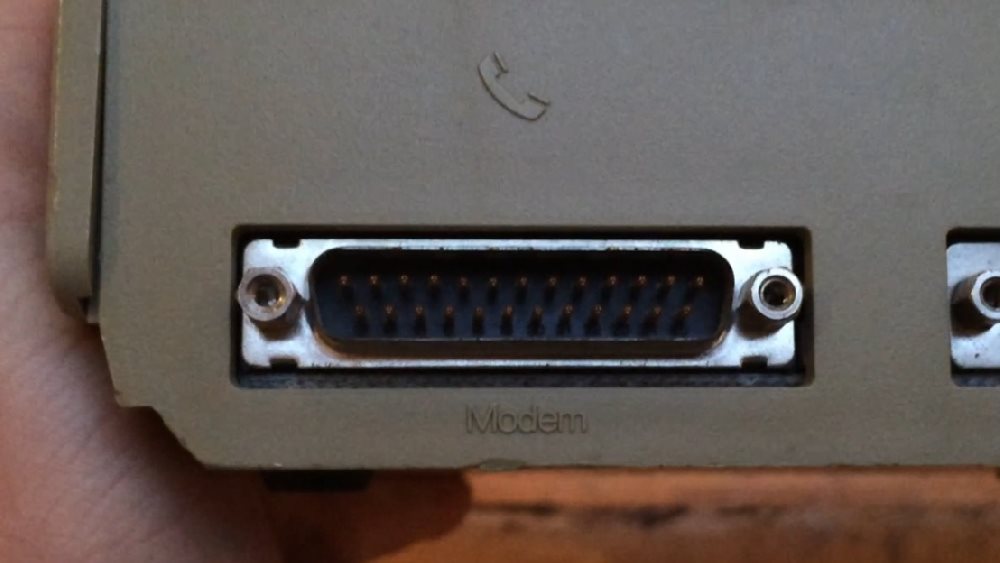
The Atari ST serial port uses a 25-pin D-SUB male connector. The serial ports traditionally found on PCs use a 9-pin D-SUB male connector (if there’s one there at all). So to connect the two, you need a 25-pin D-SUB female to 9-pin D-SUB female cable. Or, in insider lingo, DB25F-DB9F.
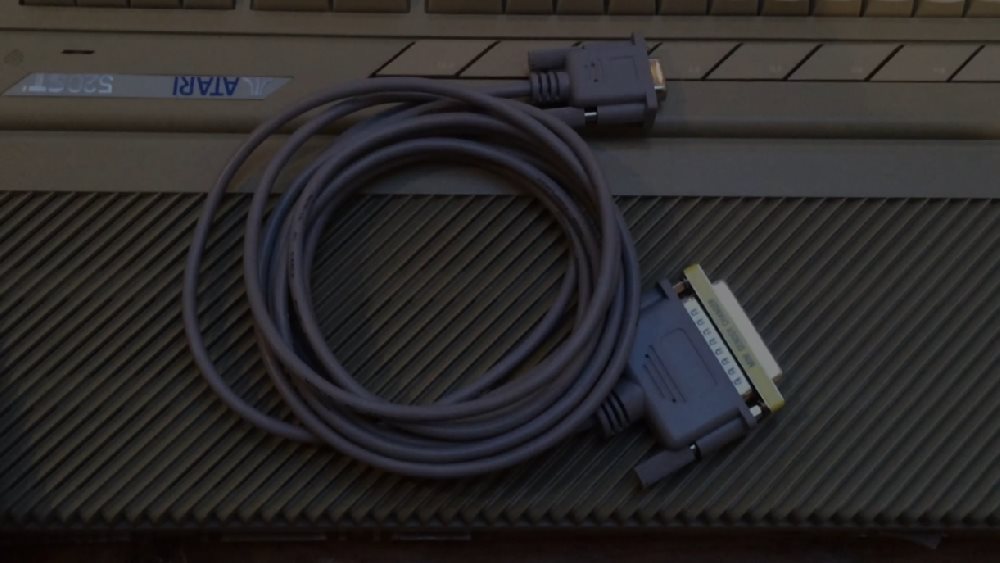
If your PC doesn’t have a serial port at all (many modern PCs don’t), you can get away with using a serial to USB adapter cable (DB25F-USB).
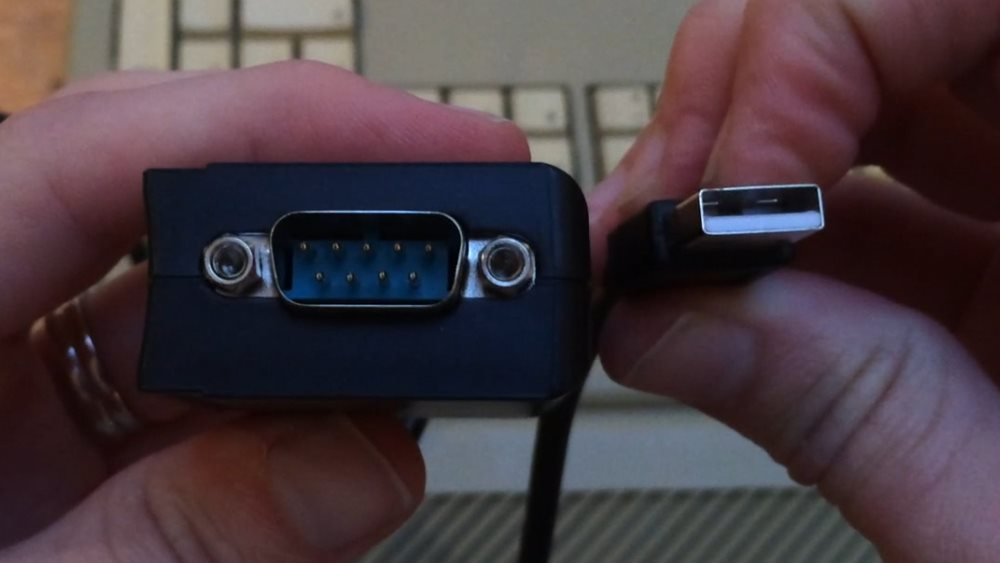
Get the right cable, then connect your PC and ST together.
2. Download the Ghostlink software
You can download Ghostlink here. It comes as an archive with two files:
STMASTER.PRG- The Ghostlink client. Run this on your ST.PCSLAVE.EXE- The Ghostlink file server. Run this on your PC.
3. Download DOSBox
Being an MS-DOS program, Ghostlink doesn’t play nice with newer versions of Windows. To work around these issues, we’ll make use of a DOS emulator - DOSBox. You can download it here.
4. Configure DOSBox
To get our file transfer working, we need to properly configure the COM port and DOSBox’s COM redirection.
Head to the Windows Device Manager, expand “Ports (COM & LPT)” and identity what COM port you’re running on. In my case it’s COM3:
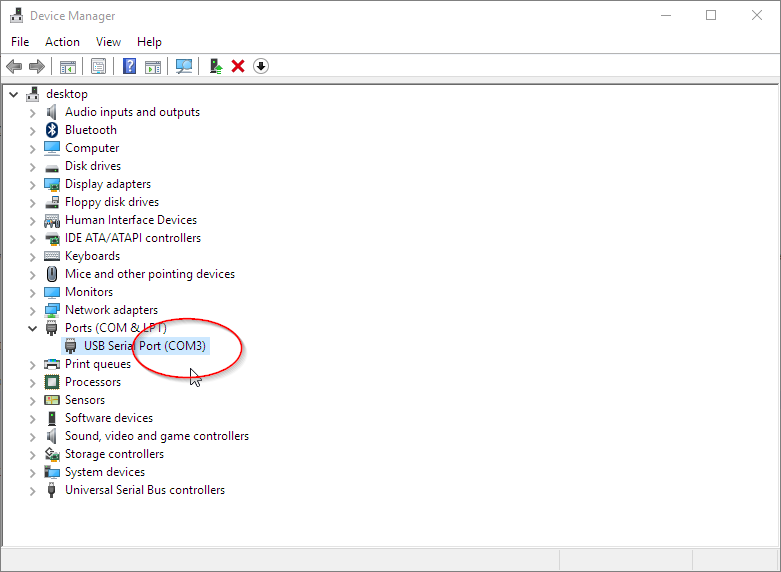
Once you’ve done this, use Windows Explorer to navigate to %localappdata%\DOSBox. Locate a file named DOSBox.conf (or similar). You may need to start DOSBox just the once to make this file appear.
When you’ve found the file, open it in your favourite text editor, navigate down to the [serial] section and add the following line:
serial1=directserial realport:<MY REAL COM PORT>Or, for our example case:
serial1=directserial realport:com3This instructs DOSBox to configure a virtual port (COM1) and map it to the real/physical interface COM3.
5. Transfer Ghostlink to the ST
Before we can transfer any files down the serial cable, we need to copy the Ghostlink program across to the ST via conventional means. On your PC, prepare an ST-compatible floppy disk and copy STMASTER.PRG (from the downloaded Ghostlink archive) onto it.
6. Launch STMASTER.PRG
Switch your ST to medium resolution and launch STMASTER.PRG. When it loads up, select any/all of the preconfigured partitions and hit “Remove”:

Once you’ve removed all the preconfigured partitions, hit “Add” and select the following:

This means “I want to map drive Z: on my Atari ST to drive C: on my PC”. Once you’re done with this, hit “OK” and then “Install”:

Ghostlink appears to quit without doing anything useful - but don’t worry, it’s now memory resident and ready to talk to your PC.
8. Prepare files for transfer
Back on the PC, create a new directory and copy the following files into it:
PCSLAVE.EXE(this is part of the downloaded Ghostlink archive - see above)- Any files you want to transfer to the ST

9. Launch DOSBox, mount file share
Launch DOSBox and type the following to mount your new directory as the C: drive:
mount C: <PATH TO FILE SHARE DIRECTORY>Or, for our example case:
mount c: c:\temp\copy_files_via_ghostlink\files_for_pc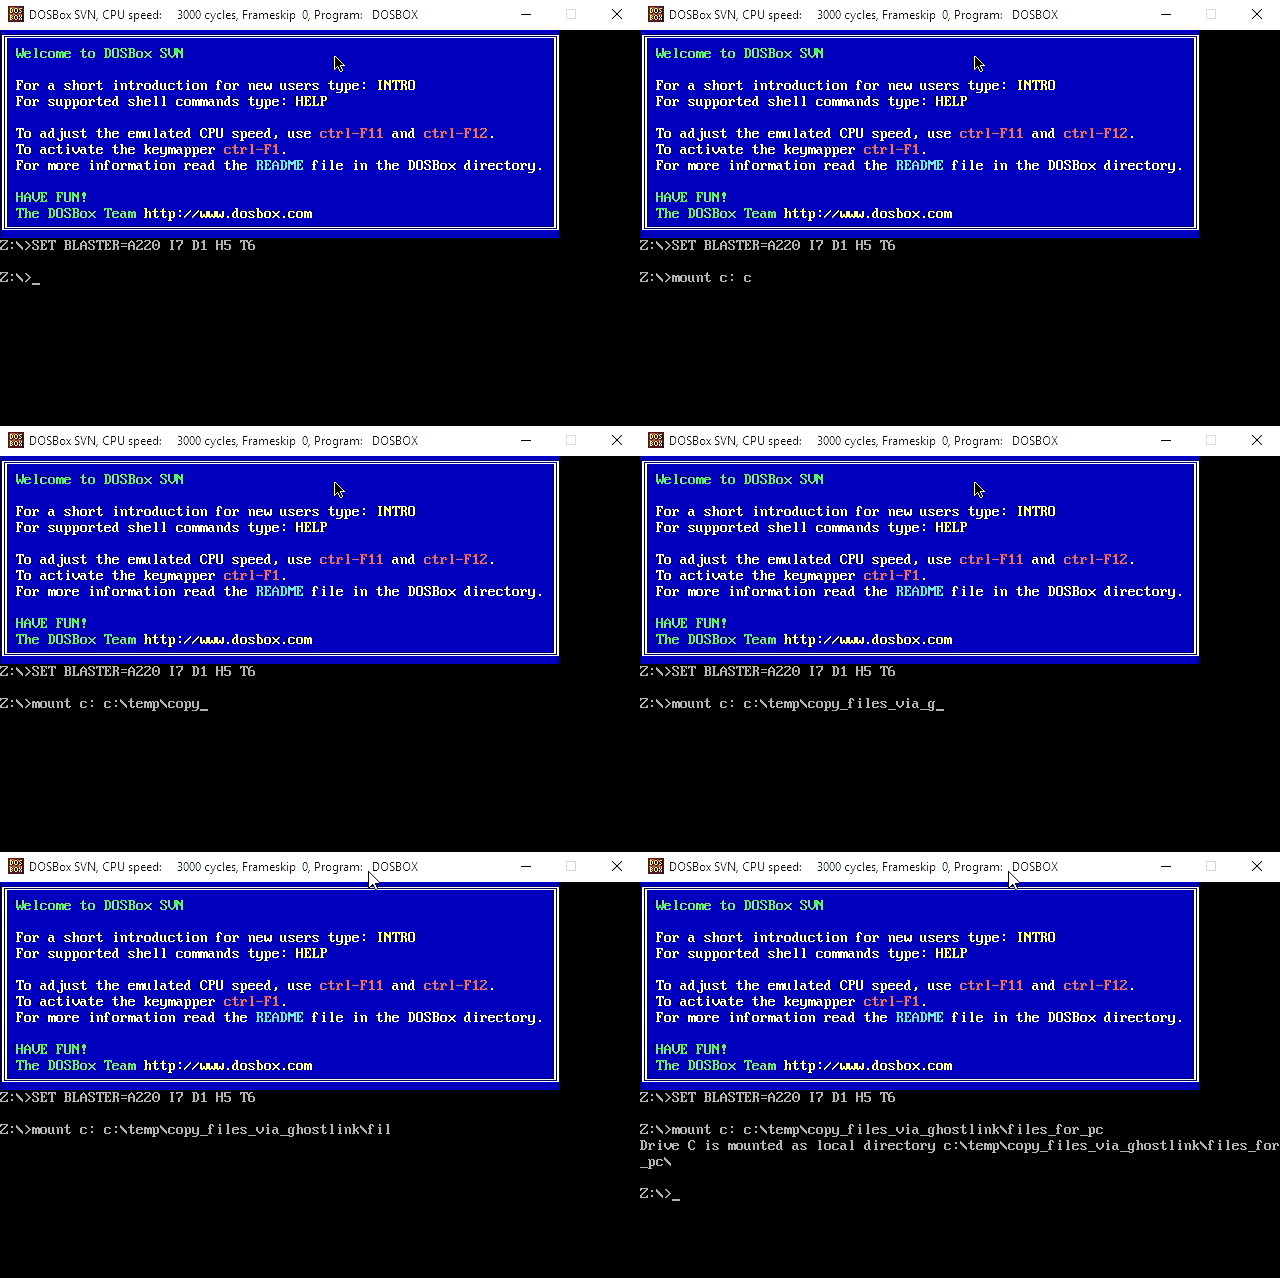
10. Launch PCSLAVE.EXE
Still in DOSBox, navigate to the C: drive and launch PCSLAVE.EXE.
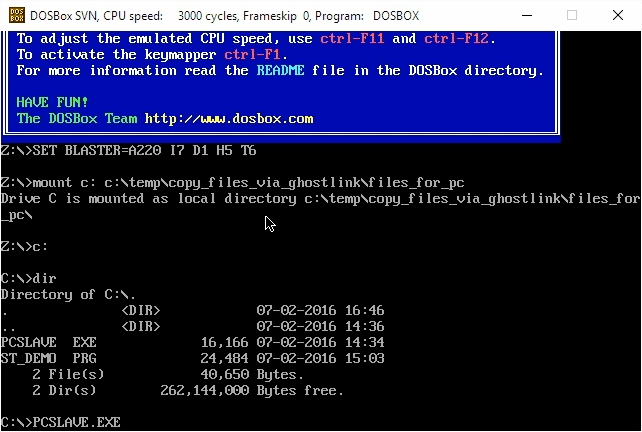
Once you’ve launched PCSLAVE.EXE, use the Function keys (F1-F10) to set the speed to 9600 Baud:

11. Map Ghostlink drive, start transferring files!
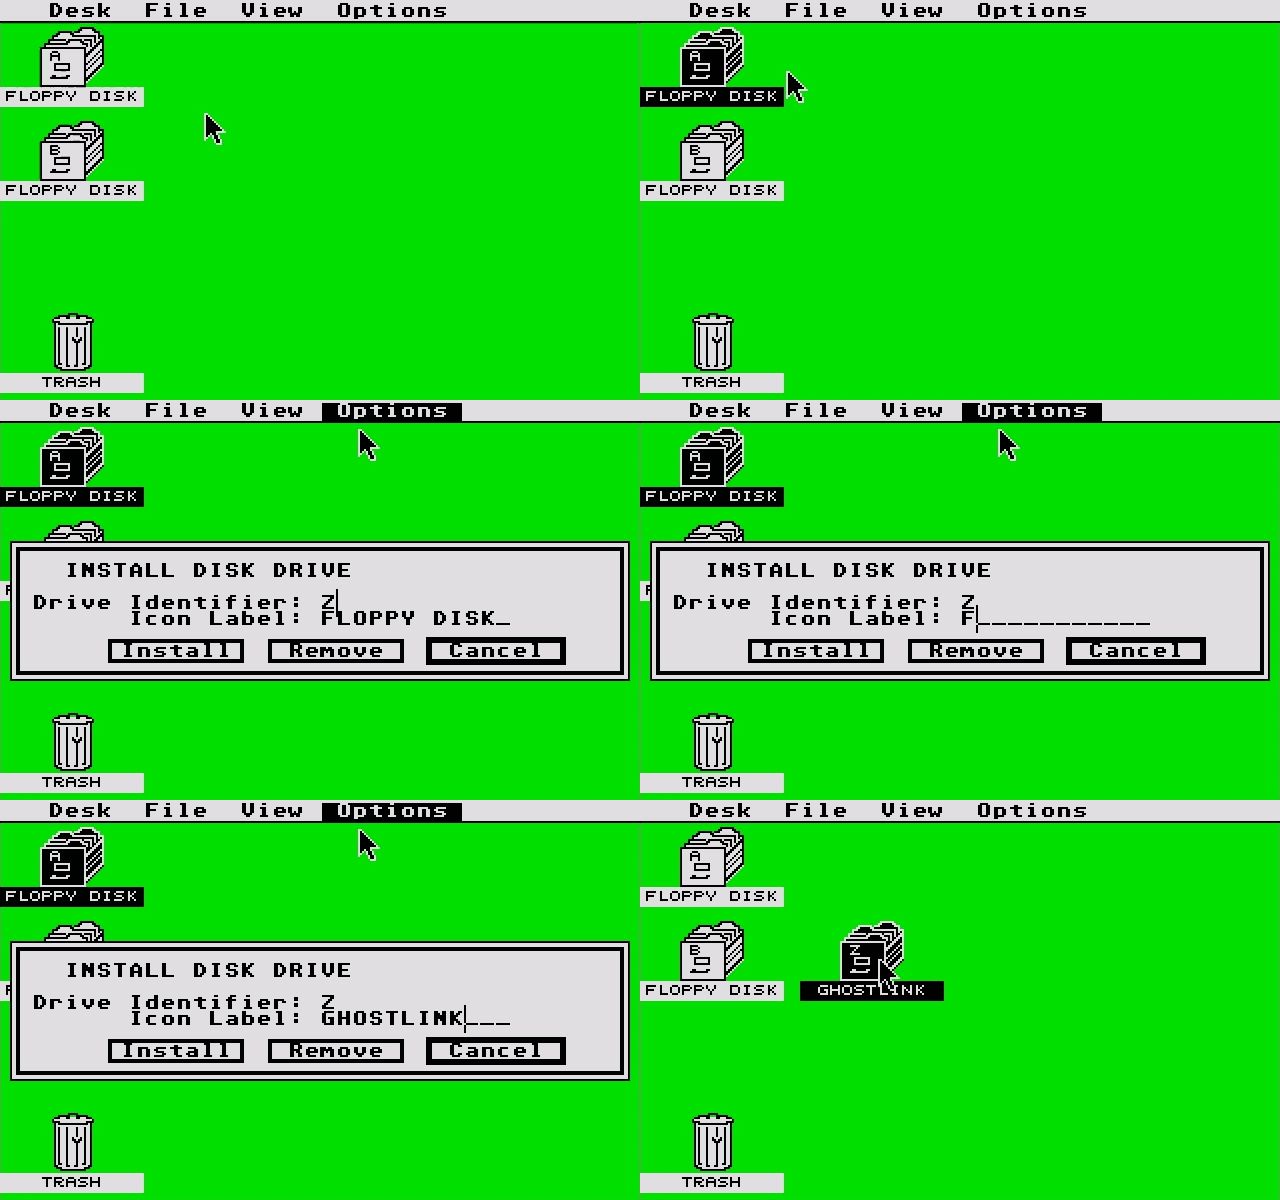
Back on the Atari ST Desktop, use the Options menu to map your Z: drive:
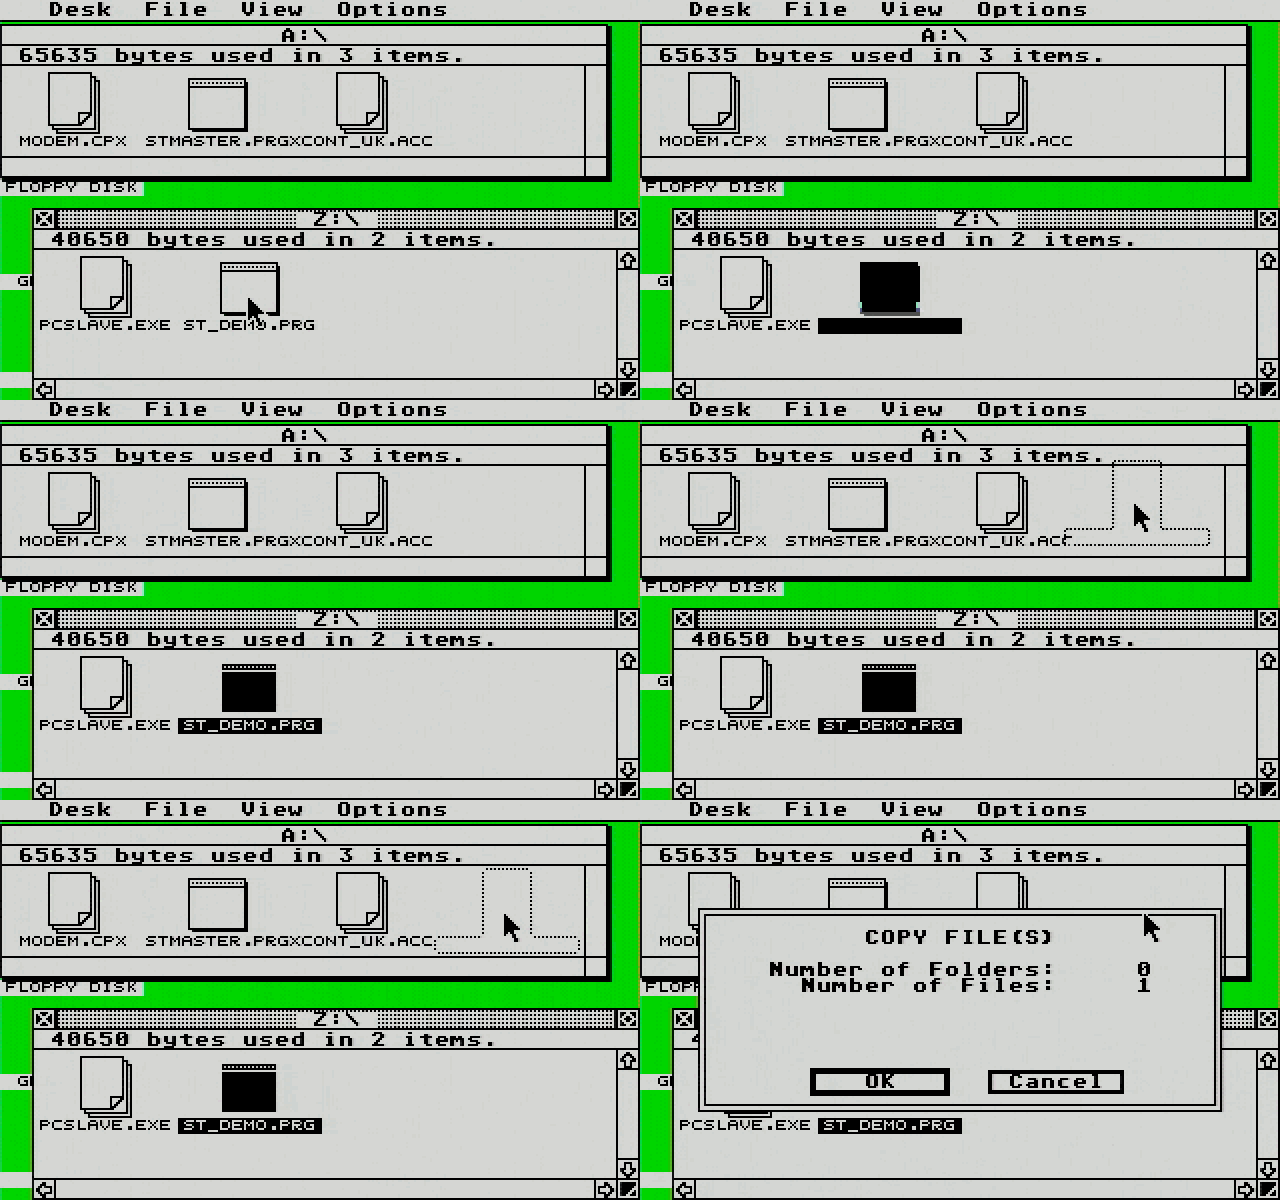
You’re ready to transfer files! Back on the Atari ST’s GEM Desktop, open up your new Z: drive and start copying files across!
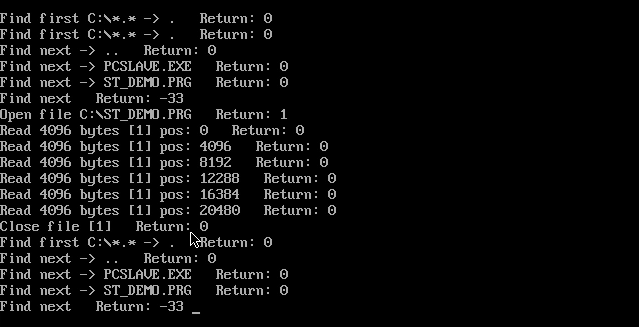
If file transfer is working as expected, you’ll see telemetry in the DOSBox window:
That’s pretty much it! Happy file transferring!
Crank up the speed
9600 bits per second is a little slow. If you want to speed things up a little, try the following:
Download XControl and copy it to your ST.
- To install, put
XCONT_UK.ACCorXCONTROL.ACCinto the main/root directory of your ST’s startup disk (usually A: or C:). - Launch XControl via “Desk” -> “Control Panel”
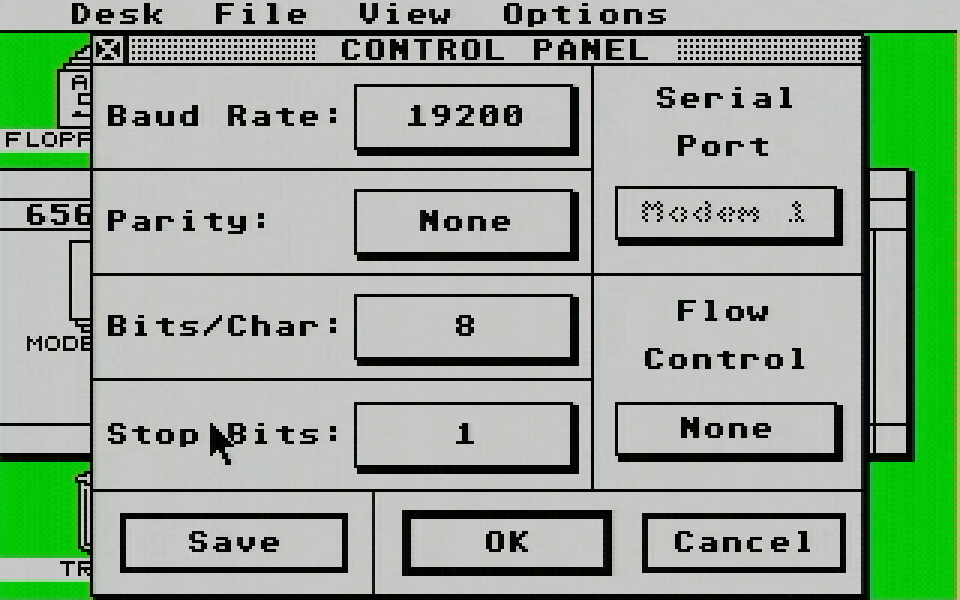
Once you’ve loaded XControl, head to “Modem Settings” and increase your ST’s Baud Rate to 19200:
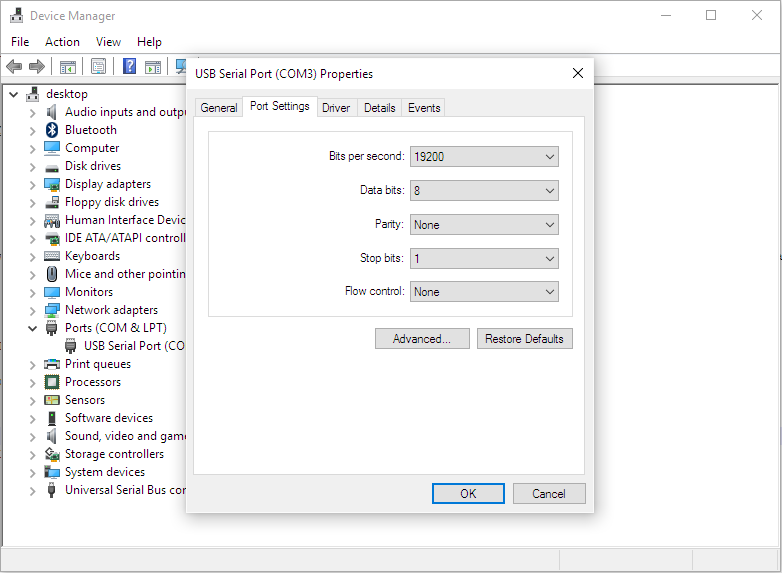
On your PC, navigate to “Control Panel” -> “Device Manager” -> “Ports (COM & LPT)” -> “Serial Port” -> “Port Settings”. Increase the bits per second to 19200 and press “OK”:
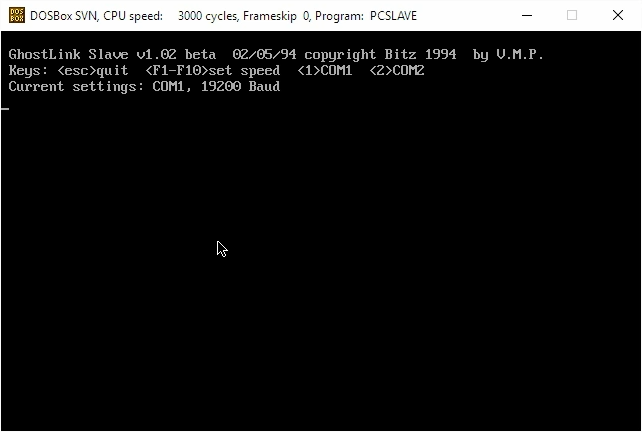
Whilst running PCSLAVE.EXE in DOSBox, press F4 to set the Baud rate to 19200:
With a bit of luck, you should now be able to push files down the serial cable twice as fast! If you’re really lucky, you might be able to push the speeds to 28800 bits per second or higher, but 19200 was the fastest that worked reliably for me.
More Atari ST Posts
- Lotus Esprit Turbo Challenge Enhanced for Atari STE - 17 Apr 2021
- Games With MIDI. The Atari ST Never Sounded So Good! - 19 Jun 2019
- Using an SD card and Ultrasatan to Transfer Files from PC to ST - 08 Mar 2016
- Using Ethernet to Transfer Files from PC to ST - 07 Mar 2016
- Using PARCP-USB to Transfer Files from PC to ST - 24 Feb 2016
- Using Serial Cable and ZMODEM to Transfer Files from PC to ST - 13 Feb 2016
- Using Serial Cable and Ghostlink to Transfer Files from PC to ST - 06 Feb 2016
- How to Split and Copy Large Files to Your Atari ST in Chunks - 31 Jan 2016
- Using Floppy Disk to Transfer Files from PC to ST - 30 Jan 2016
- Transferring Files from PC to ST - 26 Dec 2015
- Use Your PC to Create a Bootable Atari ST Game Disk - 22 Sep 2015
- Playing Downloaded Games on a Real Atari ST - 18 Sep 2015
- Atari in the Attic - 15 Aug 2015
Comments