Ethernet - probably the quickest and most convenient way to transfer files between your PC and ST.
What do you need?
- An Atari ST Ethernet adapter. You can pick up the awesome NetUSBee here for EUR60.
- A Cat5 or Cat6 Ethernet cable
- An ST-compatible floppy disk
Step 1. Connect your PC and ST together
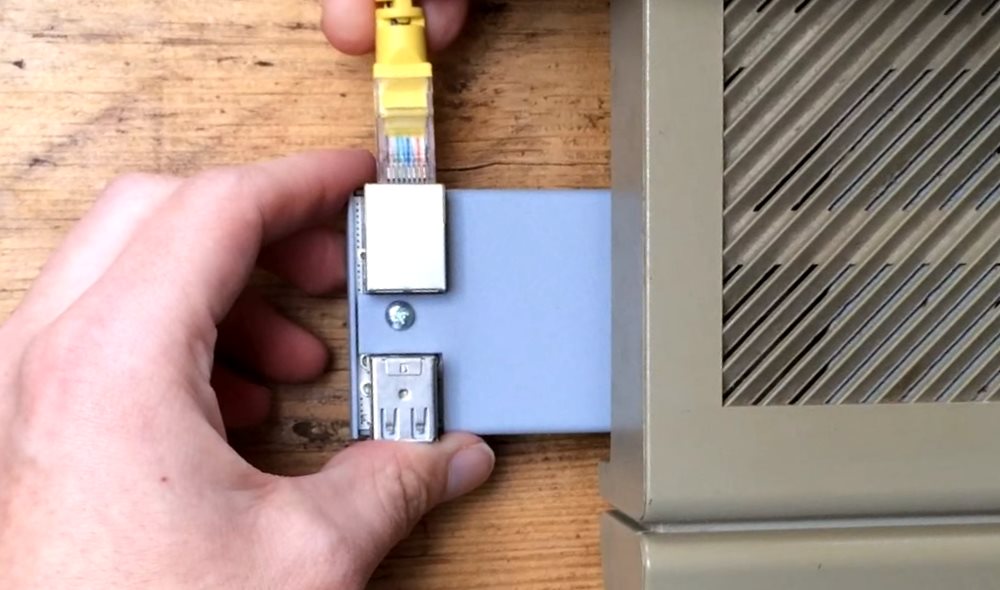
- Plug the NetUSBee into your ST’s cartridge port (usually on the left-hand side)
- Connect one end of the Ethernet cable into the NetUSBee. The other end should connect to your switch/router or (in advanced cases) to your PC’s NIC directly.

Step 2. Download and prepare uip-tool
Typically, you’ll need some Ethernet drivers and a TCP/IP stack for your Atari ST before it can talk to your PC. But luckily for us, there’s a super easy click-and-run solution out there called uip-tool. Here’s how to get started:
- Download a copy of uip-tool from here. The file you want is
UIPV43.TOS. - Copy the file onto your ST-compatible floppy
Step 3. Launch uip-tool
Pop the floppy disk in your ST and power on. Launch UIPV43.TOS. You should see something like this:

Make a note of the IP address (in this case 192.168.1.168). You’ll need this to transfer files. If you don’t see an IP address, it might be that DHCP isn’t properly configured on your network.
Step 4. Use your browser to connect to your ST
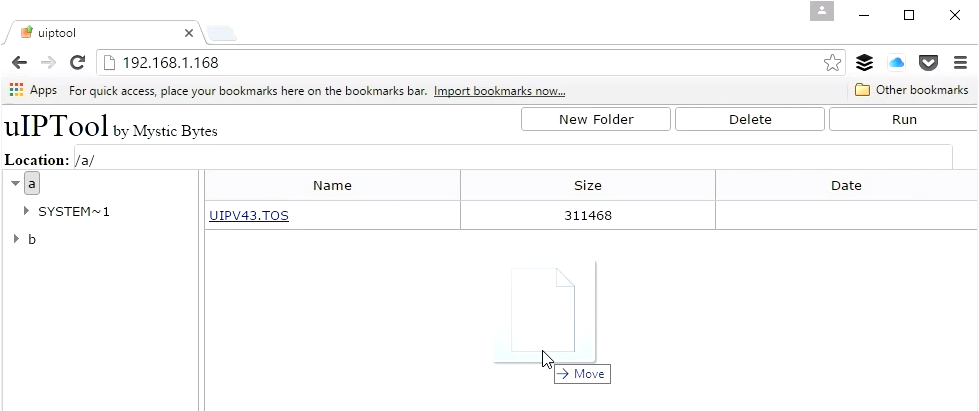
Back on the PC, launch a Web browser (any will do) and navigate to http://[your.ip.address] - for our example case it’s http://192.168.1.168. All going well, you’ll see the uip-tool web interface:

Use the leftmost column to navigate through drives and folders in the ST’s file system. Files are displayed in the main column. To upload a file, simply drag-and-drop (shown above). That’s it! Easy peasy.
More Atari ST Posts
- Lotus Esprit Turbo Challenge Enhanced for Atari STE - 17 Apr 2021
- Games With MIDI. The Atari ST Never Sounded So Good! - 19 Jun 2019
- Using an SD card and Ultrasatan to Transfer Files from PC to ST - 08 Mar 2016
- Using Ethernet to Transfer Files from PC to ST - 07 Mar 2016
- Using PARCP-USB to Transfer Files from PC to ST - 24 Feb 2016
- Using Serial Cable and ZMODEM to Transfer Files from PC to ST - 13 Feb 2016
- Using Serial Cable and Ghostlink to Transfer Files from PC to ST - 06 Feb 2016
- How to Split and Copy Large Files to Your Atari ST in Chunks - 31 Jan 2016
- Using Floppy Disk to Transfer Files from PC to ST - 30 Jan 2016
- Transferring Files from PC to ST - 26 Dec 2015
- Use Your PC to Create a Bootable Atari ST Game Disk - 22 Sep 2015
- Playing Downloaded Games on a Real Atari ST - 18 Sep 2015
- Atari in the Attic - 15 Aug 2015
Comments