ao486 is an x86 FPGA core for MiSTer, implementing all features of an 80486SX CPU. Performance-wise, the core is in line with an i486DX-33 CPU, making it perfect for DOS gaming.
To get gaming fast, use this “quick start” hard disk image, complete with:
- DOS 6.22 pre-installed
- Memory manager (EMM386) with boot configurations for Extended/Expanded memory
- Sound Blaster, CD-ROM and mouse drivers
- MiSTerFS sharing (allows easy file-sharing between PC and ao486)
Setup takes ~10 minutes. Here’s how to get started.
Quick Start Steps
-
Download this hard disk image and extract it. It’ll expand to ~2GB in size
-
Use a file transfer tool like FileZilla to copy the image to
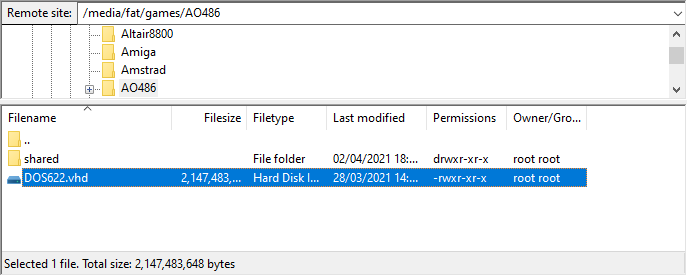
/media/fat/games/AO486on your MiSTer (learn how to do that here). You should have a single file namedDOS622.vhd:
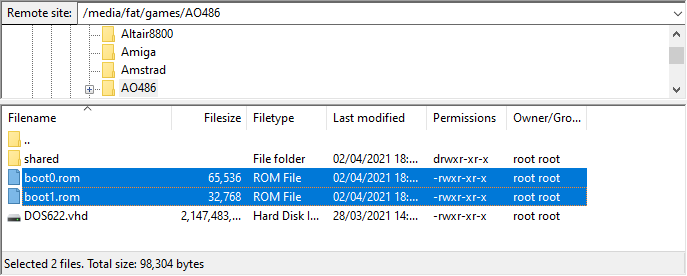
- Download boot0.rom and boot1.rom from this Releases page. Copy them to
/media/fat/games/AO486on your MiSTer:
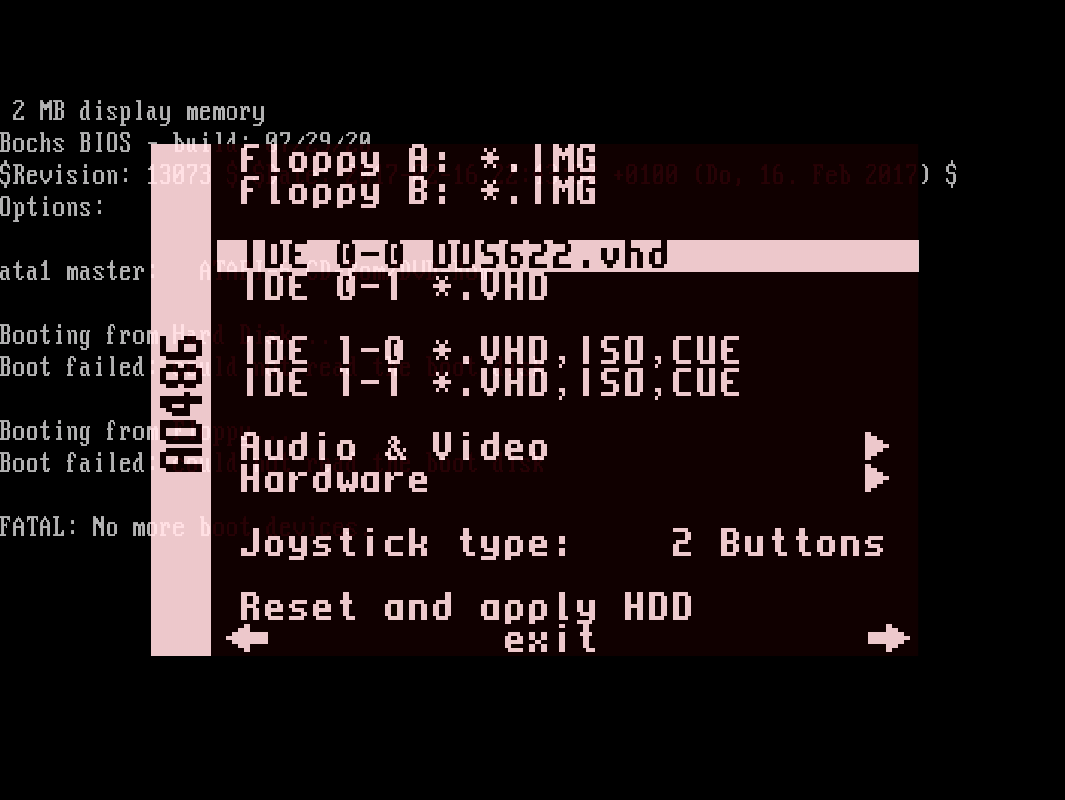
- Power up the ao486 core and mount the hard drive (Windows Key + F12 for ao486 core options, set IDE 0-0 to
DOS622.vhd):
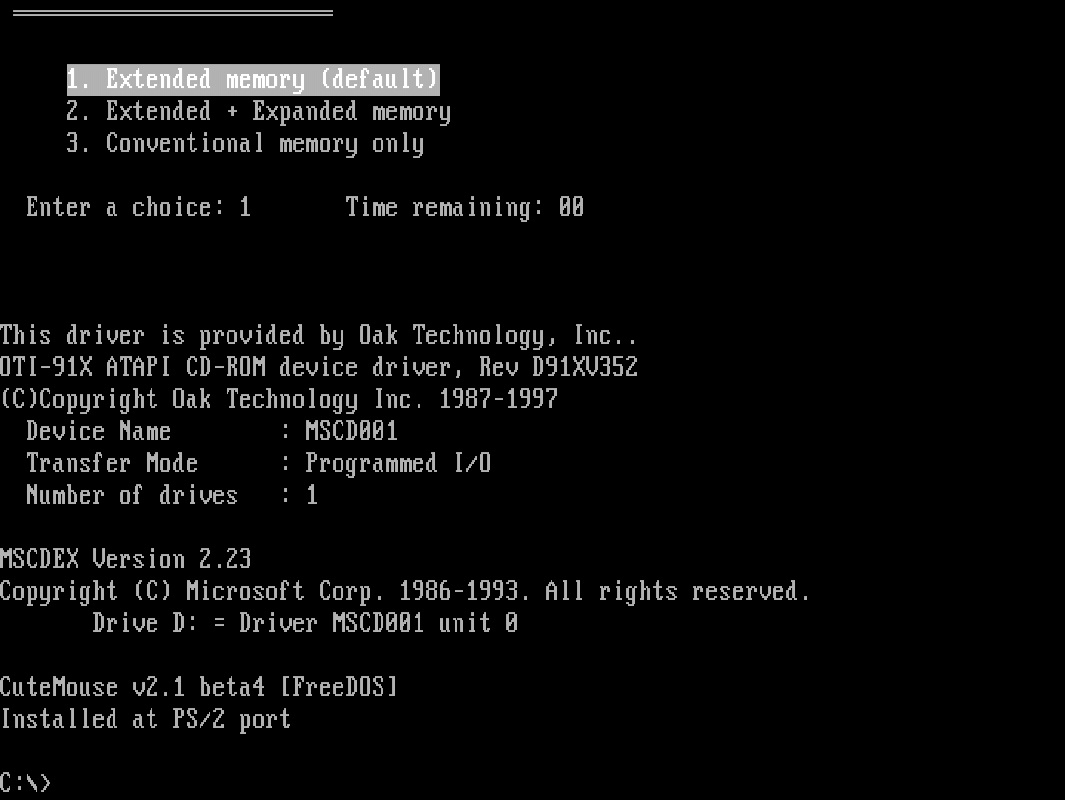
- Still in the core options menu, select Reset and apply HDD. The core will reboot and load DOS. The following indicates a succesful load:
Mounting Floppy and CD-ROM Images
Both floppy images (IMG format) and CD-ROM images (ISO and BIN/CUE formats) can be mounted natively.
To mount a floppy image, first transfer it to your MiSTer, then:
- Hit Windows Key + F12 for ao486 core options.
- Select Floppy A: and hit Enter. Select your image file and hit Enter again
- Hit Esc to exit the core options menu. Your floppy image is now mounted and available in DOS at
A:
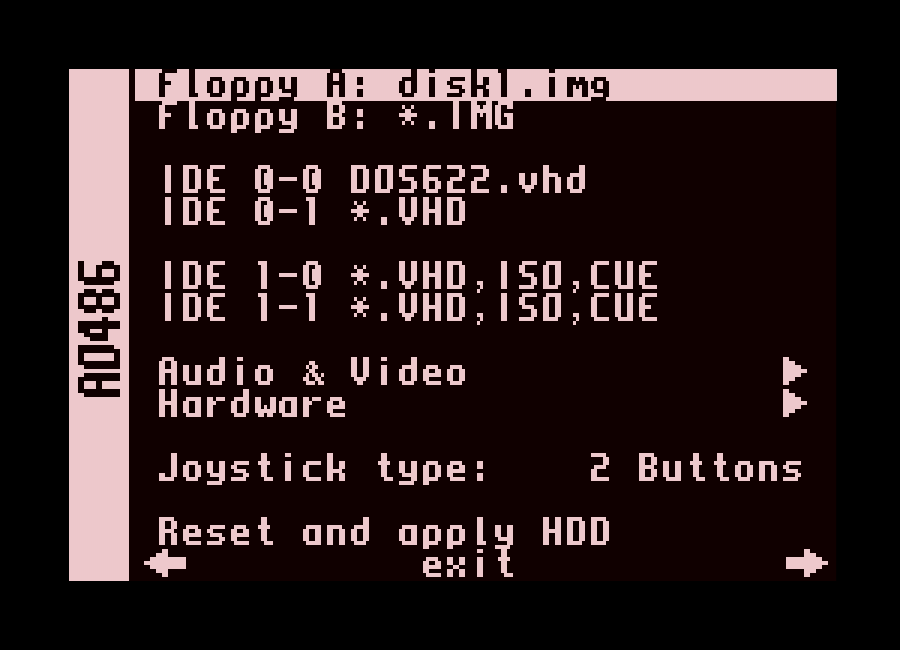
To mount a CD-ROM image, again transfer it to your MiSTer, then:
- Hit Windows Key + F12 for ao486 core options.
- Select IDE 1-0 and hit Enter. Select your image file and hit Enter again
- Hit Esc to exit the core options menu. Your CD-ROM image is now mounted and available in DOS at
D:
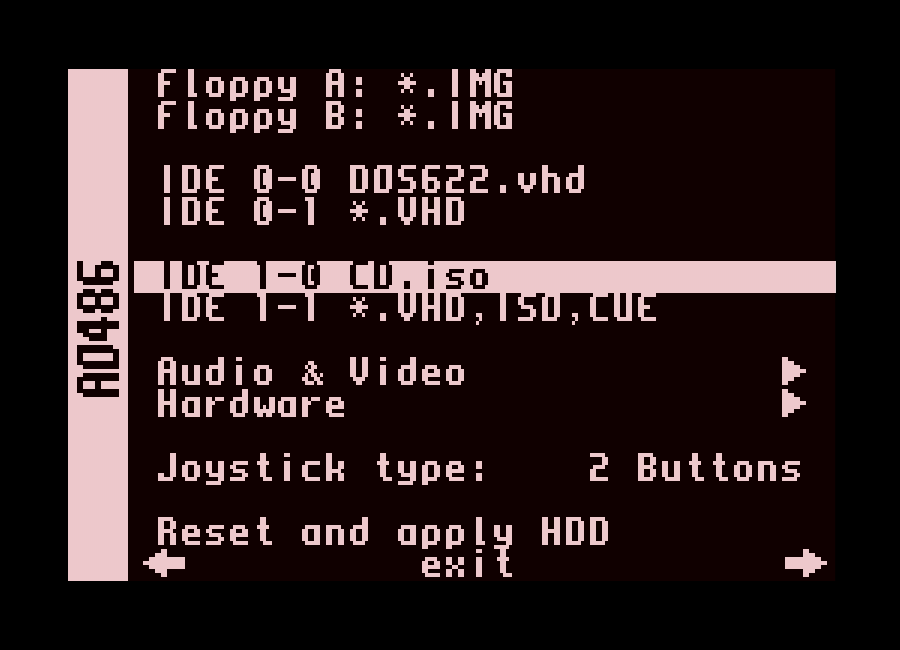
You can learn more about CD-ROM support here.
Copying Files
You can copy games files/executables directly into the DOS partition via MiSTerFS. Learn more about transferring files here.
Build Your Own ao486 Hard Disk Image
If you want to build and customize your own hard disk image (and learn along the way), here’s how:
- Create a blank hard disk image and install DOS 6.22
- Configure MiSTerFS for easy file transfer
- Install EMM386 memory manager (required for games that require Expanded/Extended memory)
- Set the BLASTER environment variable. Some games use this for sound/music setup
- Add CD-ROM and mouse support
Autoexec.bat and Config.sys
For reference. Here are the AUTOEXEC.BAT and CONFIG.SYS used in this setup. Feel free to copy/paste and use as your own inspiration for DOS builds:
AUTOEXEC.BAT
@ECHO OFF
PROMPT $p$g
PATH C:\DOS

LH C:\UTILS\MISTERFS\MISTERFS.EXE E /Q
LH C:\DOS\MSCDEX.EXE /D:MSCD001 /L:D
LH C:\DRIVERS\CTMOUSE.EXE

SET TEMP=C:\DOS
SET BLASTER=A220 I5 D1 H5 T6
CONFIG.SYS
[COMMON]
FILES=30
LASTDRIVE=Z

[menu]
menuitem=X, Extended memory (default)
menuitem=E, Extended + Expanded memory
menuitem=C, Conventional memory only

menudefault=X,10

[X]
DEVICE=C:\DOS\HIMEM.SYS /TESTMEM:OFF
DOS=HIGH,UMB
DEVICE=C:\DOS\EMM386.EXE NOEMS I=C800-CDFF X=CE00-CFFF I=D000-EFFF
DEVICEHIGH=C:\DRIVERS\OAKCDROM.SYS /D:MSCD001

[E]
DEVICE=C:\DOS\HIMEM.SYS /TESTMEM:OFF
DOS=HIGH,UMB
DEVICE=C:\DOS\EMM386.EXE RAM 8192 FRAME=D000 D=256 I=C800-CDFF X=CE00-CFFF I=D000-EFFF
DEVICEHIGH=C:\DRIVERS\OAKCDROM.SYS /D:MSCD001

[C]
DEVICEHIGH=C:\DRIVERS\OAKCDROM.SYS /D:MSCD001
Other Posts in this Series
- MiSTer FPGA Part 1 – Intro and Hardware Overview - 22 Aug 2020
- MiSTer FPGA Part 2 – Install and Setup - 20 Sep 2020
- MiSTer FPGA Part 3 – Network Access and Copying Files - 31 Jan 2021
- MiSTer AO486 Core Part 1 – Getting Started - 06 Feb 2021
- MiSTer AO486 Core Part 2 – Sharing Files With MiSTerFS - 14 Feb 2021
- MiSTer AO486 Core Part 3 – Managing Memory - 13 Mar 2021
- MiSTer AO486 Core Part 4 – Sound and Music Setup - 13 Mar 2021
- MiSTer AO486 Core Part 5 – Adding CD-ROM Support - 13 Mar 2021
- MiSTer AO486 Core Part 6 – Mouse Support - 13 Mar 2021
- MiSTer AO486 Core Part 7 – Quick Start DOS Image - 18 Mar 2021
- MiSTer AO486 Core Part 8 – Roland MT-32, Sound Canvas Audio via MidiLink - 28 Mar 2021
- MiSTer AO486 Core Part 9 – Installing Windows 95 - 28 Mar 2021
Comments