AdLib is the de facto synth standard for DOS-gaming. Almost all games support AdLib music, and popular cards like the Sound Blaster include the same Yamaha YM3812 (OPL2) chip for AdLib-compatibility.
But true DOS gamers can do better. Games from the late 80s onwards often feature vastly superior MIDI audio – with strong support for the Roland MT-32 synthesiser and (for later games) the General MIDI standard. Give this a listen:
Sounds glorious, no? Especially when compared to the (rather drab) AdLib audio version.
Thanks to fantastic work in the MiSTer community, you can get this working on your own MiSTer. Here’s how.
Step 1 – Install MidiLink
On real PCs, the Sound Blaster and other audio cards often include a MIDI interface for connecting MIDI devices. MiSTer provides a connectivity solution too via “MidiLink” – a daemon that runs on the ARM CPU, interfacing with running FPGA cores to pipe MIDI traffic downstream for playback. To get MidiLink installed:
-
Power on your MiSTer and hit F12 to open the System Settings menu
-
Run
Scripts → Yes → midilink_updater. This will install the latest version of MidiLink -
After the forced reboot, hit F12 once again to open the System Settings menu
-
This time, run
Scripts → Yes → soundfont_install. This will download the SoundFonts and ROMs necessary for MIDI playback.
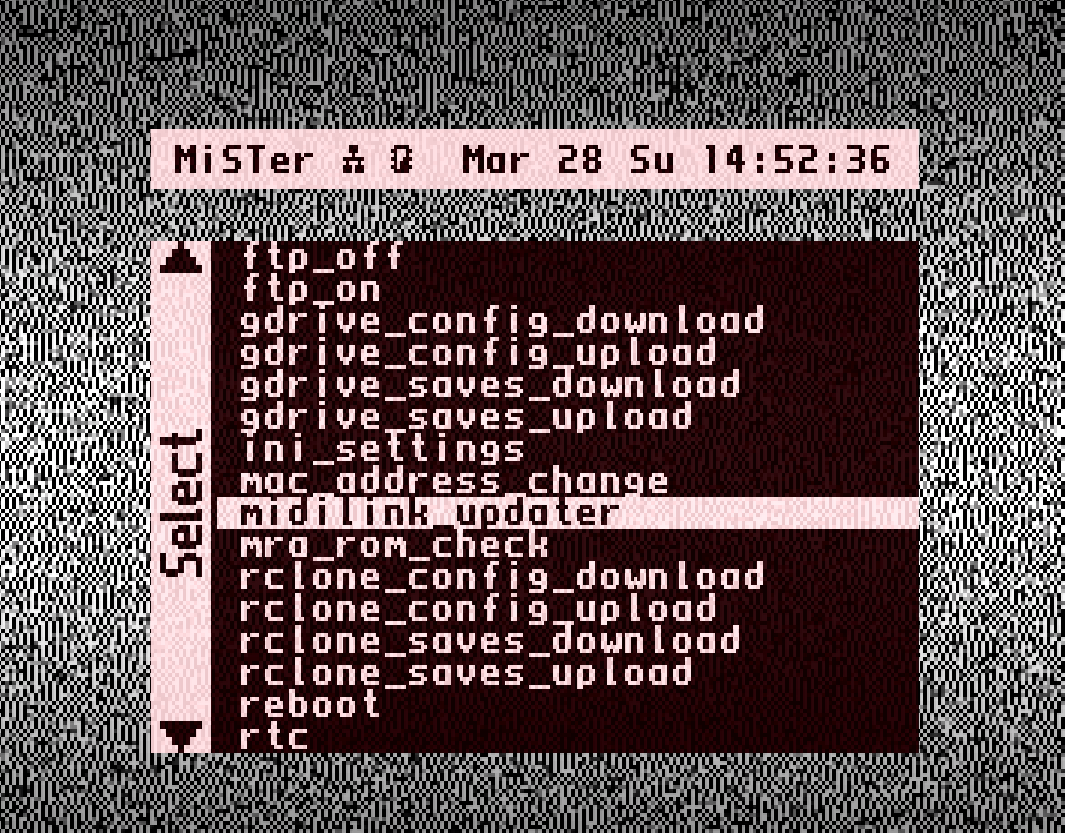
For reference, the downloaded ROMs are stored in /media/fat/linux in the following file structure:
/media/fat/linux
│
├── mt32-rom-data
│   ├── CM32L_CONTROL.ROM
│   └── CM32L_PCM.ROM
│
└── soundfonts
    └── SC-55.sf2
These paths can also be adjusted in /media/fat/linux/MidiLink.INI.
Step 2 – Enable MIDI Connection
With MidiLink installed, we’re almost ready to play! But first we need to enable the MIDI connection:
-
Boot the MiSTer ao486 core (F12 brings up the MiSTer main menu, browse to Computer → ao486)
-
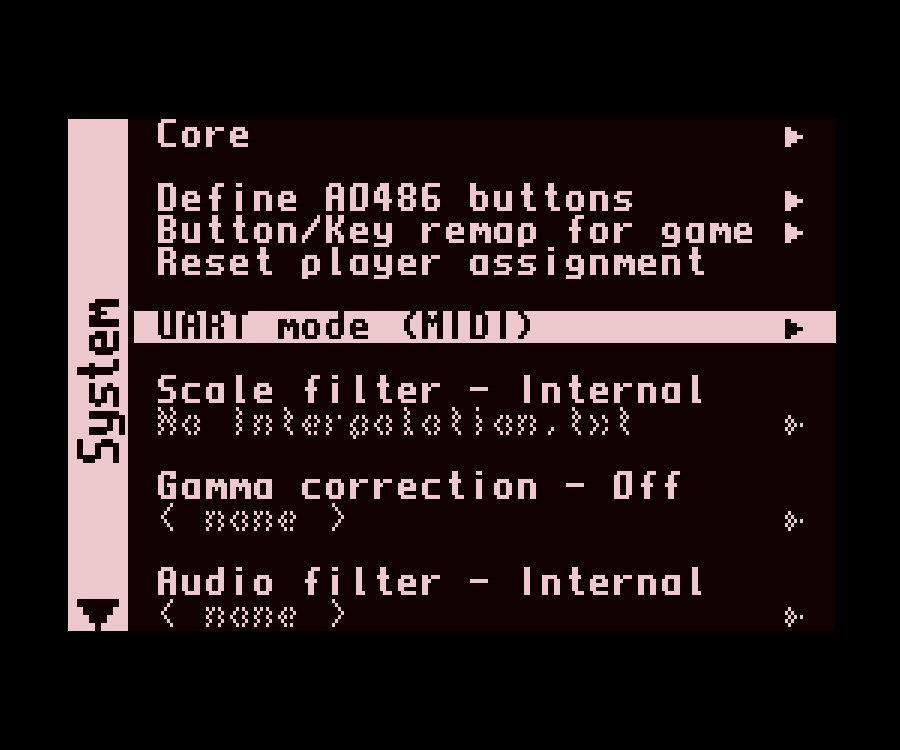
Hit Windows Key + F12 for ao486 core options. Hit the right arrow key for System options
-
Scroll to
UART mode. Hit Enter -
Set
ConnectiontoMIDI. Now we’re ready for some MIDI playback!
Step 3 – MidiLink Playback
Exploring the UART Mode menu, MidiLink has several playback options:
Connection: MIDI
│
├── MidiLink: Local
│   ├── Type: MUNT
│   └── Type: FSYNTH
│
├── MidiLink: USB
│
└── MidiLink: UDP
- Local uses real-time software synthesisers (MUNT and FluidSynth) to play MIDI audio directly on the MiSTer itself
- USB is for physically connecting a MIDI playback device (the menu option is hidden otherwise)
- UDP sends MIDI data over the network to another software synthesiser
We’ll explore each of these below.
Whichever option you pick, the MIDI port is always 330 (for use during game setup).
Roland MT-32 Playback via MUNT
Configure MidiLink as follows. Then hit Save:
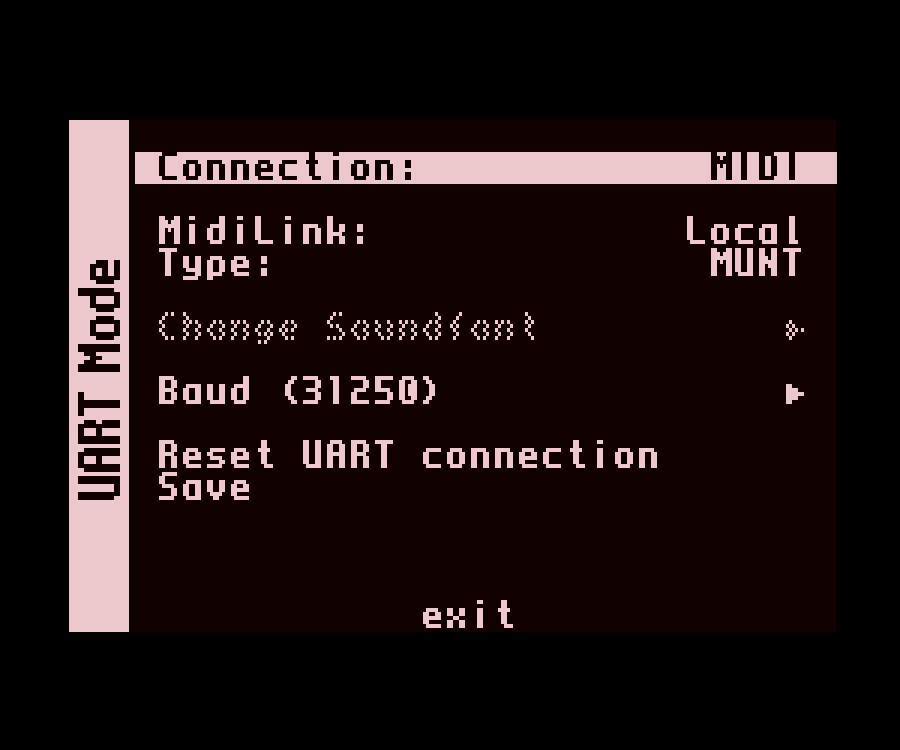
In this mode, MiSTer runs the Munt software synthesizer to emulate a real Roland MT-32. This is a super neat “ready to go” solution, with sound piped directly to your TV via the HDMI port. Give it a listen:
Unfortunately, MiSTer’s onboard ARM CPU isn’t quite powerful enough to run MUNT at full speed. You might hear some smooshed, delayed or off-pitch notes compared to authentic playback. If this is an issue for you, don’t worry – there are other options.
General MIDI Playback via FluidSynth
Configure MidiLink as follows:
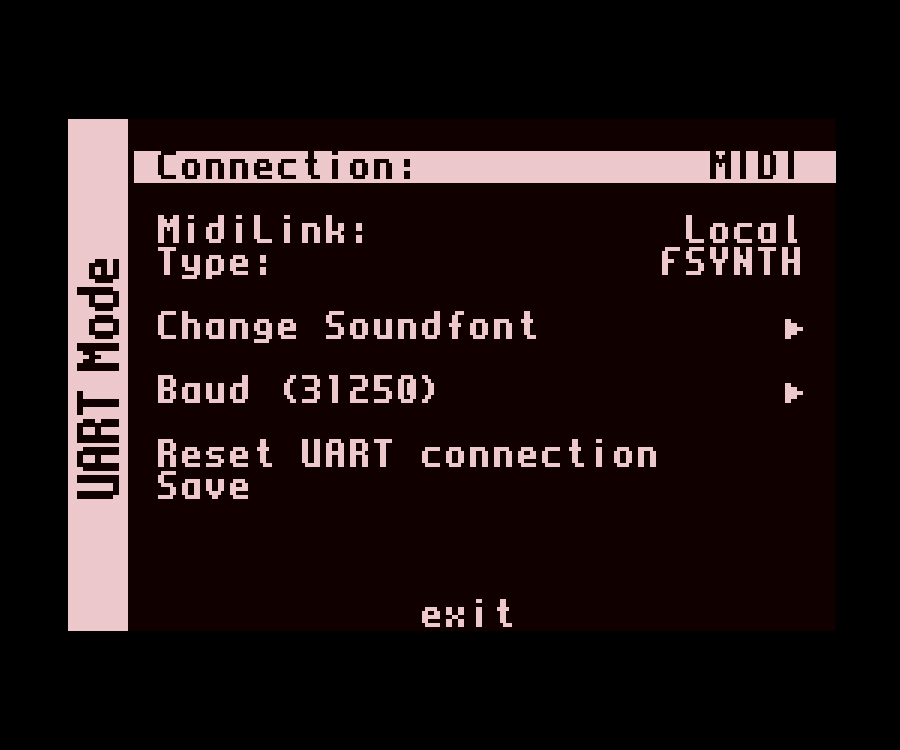
In this mode, MiSTer runs the FluidSynth software synthesizer for General MIDI playback. By default, it uses Roland SC-55 SoundFonts, but any SoundFonts will work. FluidSynth is much lighter on the CPU vs Munt and playback is very authentic. Witness this awesome rendition of the Doom E1M1 theme:
Direct Playback via USB
If you’re lucky enough to own real MT-32 or Sound Canvas hardware, you can hook it up to the MiSTer directly.
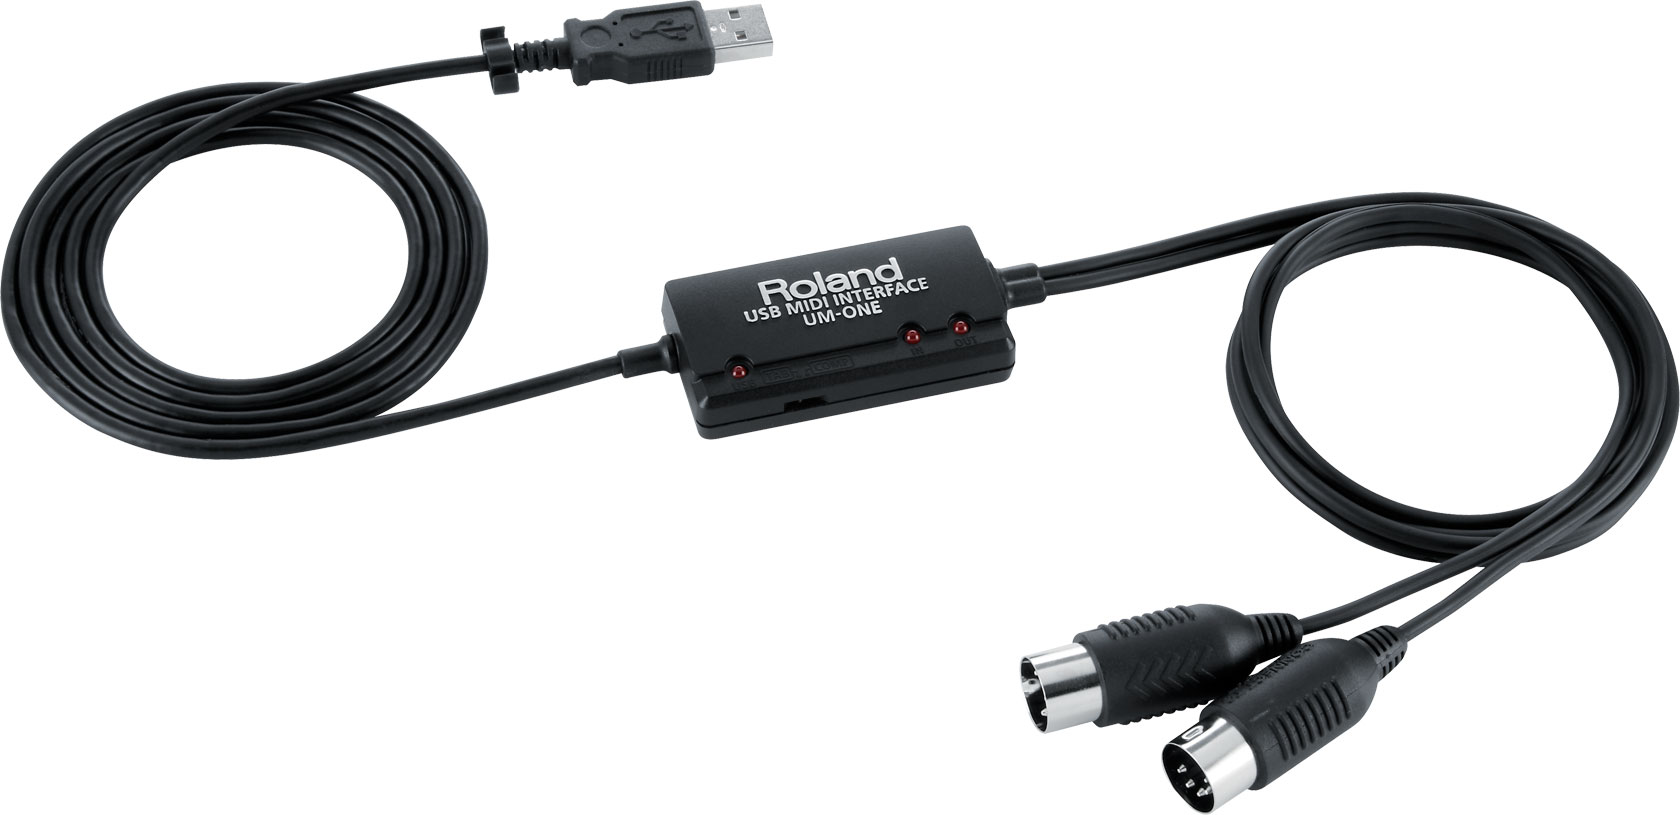
You’ll need an ALSA-supported USB MIDI adapter such as the Roland UM-ONE. With an adapter connected, the USB menu option will appear. If you don’t have a real synth, consider the mt32-pi project – a baremetal MIDI/MT-32 synthesizer for Raspberry Pi 3.
Network Playback over UDP
Configure MidiLink as follows:
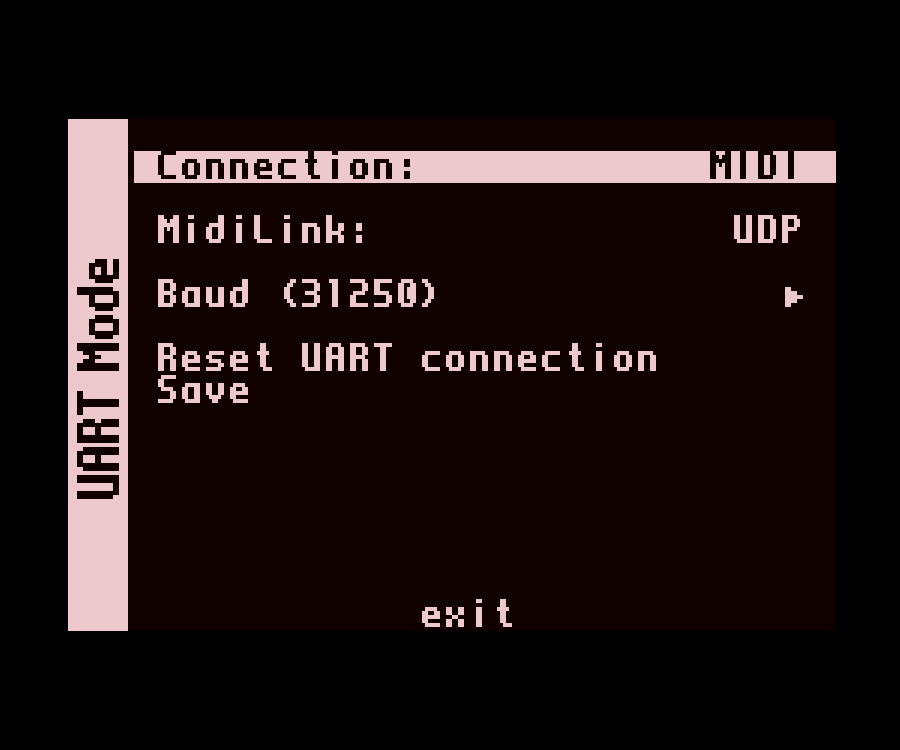
In this mode, MidiLink will transmit MIDI data onto the network as UDP packets – for playback on a networked MIDI device. To get this working:
-
Download, install and run a software synthesizer on your home PC. Munt works well for MT-32 emulation and VirtualMIDISynth for General MIDI
-
Copy the necessary MT-32 ROMS / SoundFonts from your MiSTer. Find them in
/media/fat/linux -
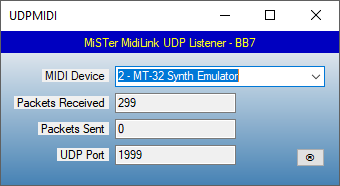
Download and run UDPMIDI. This small program will receive the UDP MIDI packets and forward them to your selected synth
-
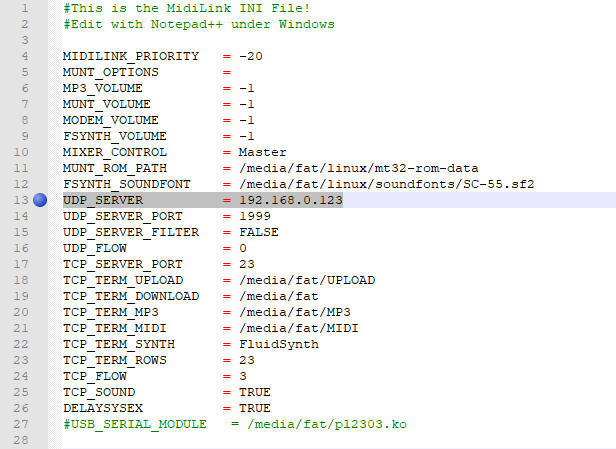
Edit
/media/fat/linux/MidiLink.INIon your MiSTer. SetUDP_SERVERto the IP address of your home PC:
- When MIDI playback begins in ao486, UDPMIDI will start receiving packets and playback should start!
UDP Troubleshooting
If you have trouble receiving packets, check your personal firewall. I use Windows Defender Firewall and had to add an incoming rule to allow private network traffic on UDP port 1999:
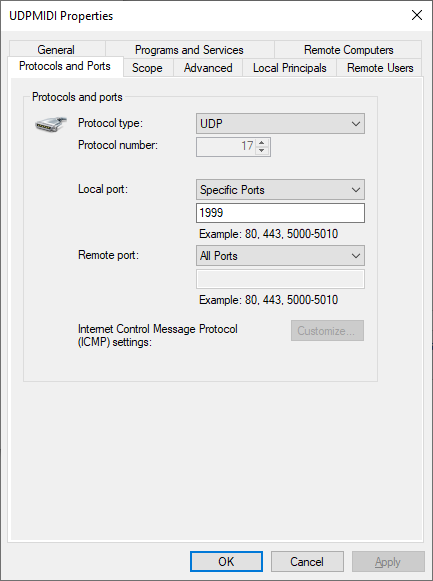
As an alternative to UDPMIDI, it’s also possible to build MidiLink from source and run in “listen” mode. The command line args are:
UDPMUNT– to listen and forward to MuntUDPFSYNTH– to listen and forward to FluidSynth
You can even run MidiLink on mt32-pi for an “appliance-like” solution. More details here.
Wrap Up
That’s it! We’ve explored all facets of MidiLink and MIDI playback options in ao486. Good luck with your own MIDI adventures!
Other Posts in this Series
- MiSTer FPGA Part 1 – Intro and Hardware Overview - 22 Aug 2020
- MiSTer FPGA Part 2 – Install and Setup - 20 Sep 2020
- MiSTer FPGA Part 3 – Network Access and Copying Files - 31 Jan 2021
- MiSTer AO486 Core Part 1 – Getting Started - 06 Feb 2021
- MiSTer AO486 Core Part 2 – Sharing Files With MiSTerFS - 14 Feb 2021
- MiSTer AO486 Core Part 3 – Managing Memory - 13 Mar 2021
- MiSTer AO486 Core Part 4 – Sound and Music Setup - 13 Mar 2021
- MiSTer AO486 Core Part 5 – Adding CD-ROM Support - 13 Mar 2021
- MiSTer AO486 Core Part 6 – Mouse Support - 13 Mar 2021
- MiSTer AO486 Core Part 7 – Quick Start DOS Image - 18 Mar 2021
- MiSTer AO486 Core Part 8 – Roland MT-32, Sound Canvas Audio via MidiLink - 28 Mar 2021
- MiSTer AO486 Core Part 9 – Installing Windows 95 - 28 Mar 2021
More MIDI articles
- PI-MIDI Review – Supercharge your mt32-pi - 04 Jun 2022
- DreamBlaster X2GS – A New MIDI Challenger? - 02 Oct 2021
- mt32-pi – Testing out New USB Serial Support - 25 Jul 2021
- Get the Best MS-DOS Audio With mt32-pi - 03 May 2021
- MiSTer AO486 Core Part 8 – Roland MT-32, Sound Canvas Audio via MidiLink - 28 Mar 2021
- Games With MIDI. The Atari ST Never Sounded So Good! - 19 Jun 2019
Comments